Yes—you can use Cursor video editing tools from your IDE by connecting ChatCut Desktop as a local stdio Cursor MCP server. Cursor Agent and the Cursor CLI can then ask the editor to change an editable multi-track timeline: transcribe speech, cut filler words, add captions and graphics, mix audio, and export horizontal or vertical video.
We make ChatCut, the timeline video editor in this guide. The chat windows below are code-built recreations of Cursor’s interface. The edit itself was one real shared master project run in ChatCut Desktop through an external agent (Codex); sending the same prompts from a connected Cursor Agent gives it access to the same ChatCut tools, but does not guarantee identical decisions, results, or timing. We did not execute this edit in Cursor.
The walkthrough turns a 2-minute 48-second recording into horizontal and vertical 60-second videos. The original master project’s eight-step work window was 13 minutes 46 seconds, including tool waits and checks; this excludes the later B-roll rework. The B-roll used in the finished edit cost 4.38 ChatCut credits; removing garbled screen text required 3 generations totaling 13.14 ChatCut credits for this shot. All other steps used 0 ChatCut credits. Cursor setup details below come from official documentation. For other setups, see our ChatGPT and Codex video editing guide and comparison of the best video editing MCP servers.
What does the finished 60-second edit look like?
Before touching mcp.json, press play on the finished 16:9 MP4 produced at the end of the master’s eight-step sequence from a single 168.2-second raw talking-head take:
The master timeline contains these editable elements:
- 0:00 to 0:03: A transparent HTML Motion Graphics opening title (“Make ideas move.” under “CHATCUT · THE NEW RELEASE”) with an expanding orange accent line.
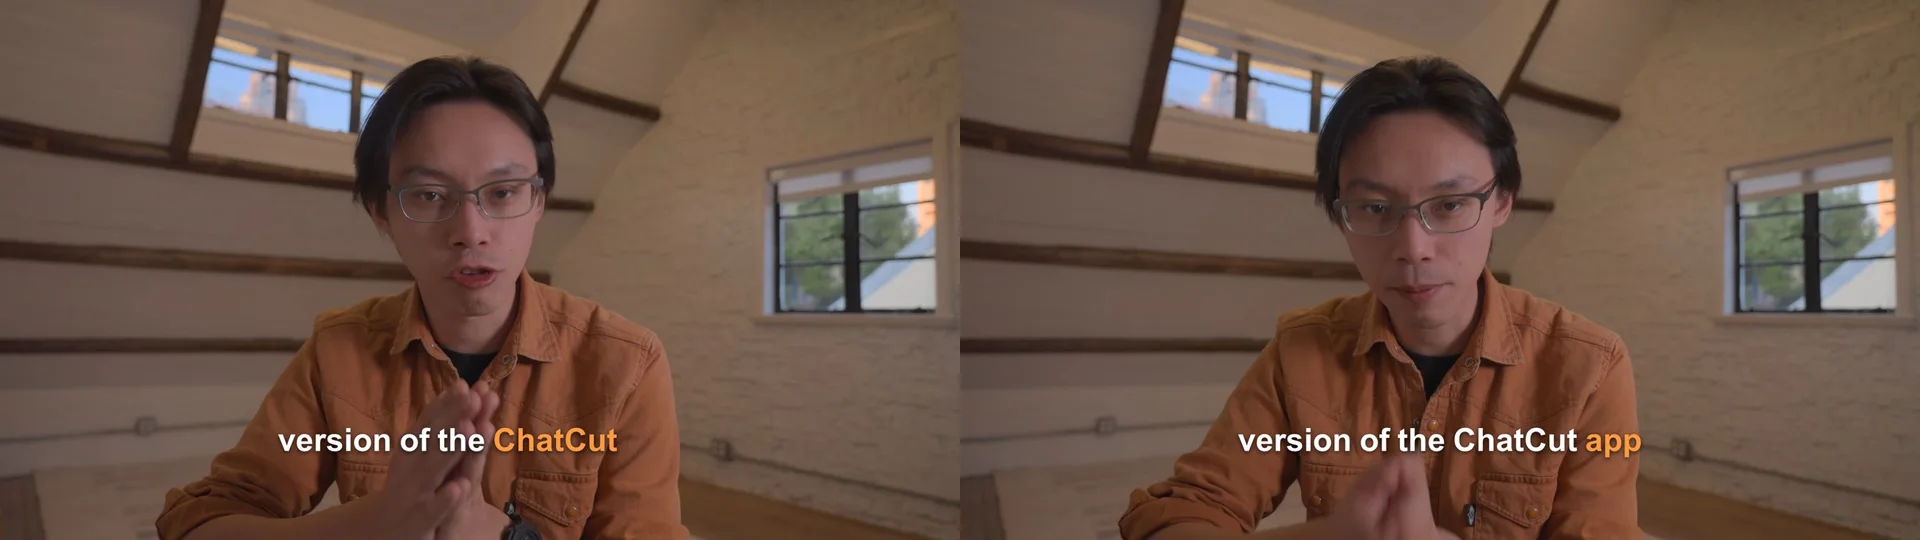
- Captions: Bold white Arial lower-third captions where only the word currently spoken highlights in warm orange (#FF9B40), then returns to white.
- 0:07.5 to 0:13.5: A staggered three-point Motion Graphics callout (“01 Stability + performance”, “02 A redesigned UI”, “03 AI Motion Graphics”) placed over the open attic wall on the right, paired with a 1.18× spring punch-in zoom at 0:09.3.
- 0:36.433 to 0:37.2: A library whoosh (-14 dB) marks the topic change; the second 1.18× punch-in runs from 0:38.5 to 0:42.367.
- 0:42.5 to 0:46.5: One 4-second 720p Seedance 2.5 slow push-in toward a monitor on a wooden desk in a warmly lit attic. Its dark gray screen shows one large orange square above five color blocks (cyan, purple, green, orange, and blue)—an abstract illustration, not a real software interface or a complete multi-track timeline (4.38 ChatCut credits for the final clip; 13.14 total across 3 generations to remove garbled screen text), muted so the presenter’s voice continues cleanly underneath.
- 0:00 to 1:00: ViraMiller’s Relaxing Ambient Melodies (CC BY 4.0) with a 1.5-second fade-in, automatic voice ducking (the full mix measured -20.3 LUFS integrated loudness), and a 2.0-second fade-out.
How do you start editing video in Cursor in five steps?
- Install and connect ChatCut Desktop. Open Cursor Agent (
Cmd+I/Ctrl+I) on macOS 13+ or Windows 10+ x64 and sendRead ChatCut.io/desktop to install ChatCut, or add the local connection to~/.cursor/mcp.json, sign in inside ChatCut Desktop, and open a fresh Agent chat. - Import local media and transcribe. Point Cursor at a video in your workspace or import files via My Assets in ChatCut Desktop, then ask the agent to run speech transcription.
- Lock the A-Roll cut first. Cut filler words, false starts, repeated lines, and dead air, then add word-level captions, punch-in zooms, and subtle library sound cues while the spoken structure is easy to audit.
- Add B-Roll, Motion Graphics, and audio. Layer code-authored titles and callouts (0 ChatCut credits), request an upfront credit quote before generating any AI B-roll clip, and duck background music under speech.
- Inspect the timeline and export locally. Scrub the multi-track timeline in ChatCut Desktop, export watermark-free 16:9 and 9:16 MP4s locally on your machine, or hand off an FCP7 XML timeline to Premiere Pro or DaVinci Resolve.
What do you need before connecting ChatCut to Cursor?
- macOS 13+ or Windows 10+ (x64) running locally. Cursor’s editor installs on macOS, Windows, and Linux (Cursor Quickstart), whereas ChatCut Desktop supports macOS 13+ (Apple silicon or Intel) and Windows 10+ (x64) only—Linux is not supported (ChatCut Product Facts). Because this connection uses a local
stdioserver on the same computer as ChatCut Desktop, run edits in your local Cursor editor or local terminal, not inside a remote Cursor Cloud Agent VM or remote SSH workspace. - A Cursor account with Agent access. Under Cursor’s Models & Pricing (part of The X Subscription, alongside legacy Pro/Pro+/Teams seats), Free ($0) includes limited Agent usage, Plus ($8/mo) provides a weekly pool for Cursor’s native models (Grok 4.7, Grok 4.6, Grok 4.5, and Composer 2.5), and Premium ($30/mo), Super ($100/mo), and Ultra ($200/mo) unlock third-party frontier models (Anthropic, OpenAI, Google) billed at API list price from prepaid credit.
- A signed-in ChatCut account. When driven by your external agent, ChatCut’s Free plan supports uploads, local timeline editing, speech transcription, captions, agent-written Motion Graphics, and local Desktop video export without watermarks or ChatCut credit charges. Generating AI video clips or images requires a paid ChatCut plan (starting at $25/month for 100 credits).
- Local source footage and optional repo docs. Keep your MP4/MOV recordings in a readable local folder—and if you are cutting a release video or developer tutorial, open the repository containing your
CHANGELOG.md,README.md, or script so you can@-mention them directly in Cursor.
| Part of the workflow | Which plan covers it | Master-project charge / billing scope |
|---|---|---|
Cursor Agent turns (Cmd+I / Ctrl+I) or Cursor CLI (agent) tool orchestration | Your Cursor plan (current individual tiers use a weekly native pool or prepaid third-party model credit; legacy plans differ) | Separate host subscription/API allowance; Cursor cost was not measured in this master run |
| Importing local footage, cloud transcription, rough cuts, word-level captions, zooms, library SFX, and HTML Motion Graphics | ChatCut Free or paid plan (Credits policy) | 0.00 ChatCut credits (Steps 1–5 and Step 7) |
| Local 1080p / 4K MP4 export in ChatCut Desktop (or XML timeline export) | Local exports use no ChatCut credits; cloud exports include a free allowance, beyond which they follow ChatCut’s current credit rules (see Web vs Desktop Export) | 0.00 ChatCut credits (both 16:9 and 9:16 exports in Step 8) |
| ChatCut-hosted AI video, image, music, voiceover, or SFX generation | ChatCut credits (Pricing; paid plan required for AI video generation and ChatCut image generation) | 4.38 ChatCut credits for the final 4s 720p Seedance 2.5 clip; 13.14 credits across 3 generations to remove garbled screen text (Step 6) |
How does Cursor video editing work with a Cursor MCP server?
Cursor implements the open Model Context Protocol (MCP) across stdio, SSE, and Streamable HTTP transports (Cursor MCP documentation). As we broke down in our guide to the best video editing MCP servers, connecting video tools to Cursor is easier to evaluate by asking what you can inspect and edit afterward:
- Rendered files: A rendered MP4 can be reviewed in a player; an editable project is a separate deliverable.
- Hosted connections: Check the service’s media-access requirements before planning a workflow around local footage.
- ChatCut Desktop’s local
stdioconnection reads high-bitrate footage directly off your SSD, edits a live multi-track.chatcutprojecttimeline on your machine, and renders locally up to 4K without burning cloud export minutes (ChatCut Desktop guide).
Option 1: One-message install inside Cursor Agent
Open Cursor on macOS 13+ or Windows 10+ x64, press Cmd+I (Ctrl+I on Windows) to open the Agent pane, make sure Agent mode is selected, and send the setup prompt from chatcut.io/desktop:
Cursor Agent fetches the plain-text instructions at chatcut.io/desktop, runs the official installer (curl -fsSL https://chatcut.io/install.sh | sh on macOS or irm https://chatcut.io/install.ps1 | iex in Windows PowerShell—no Node.js or npm required), launches ChatCut Desktop for sign-in, and wires up the local stdio MCP connection.
Option 2: Configure ~/.cursor/mcp.json or .cursor/mcp.json directly
For Cursor, use Agents on this computer → Connect any agent in ChatCut Desktop and follow its copied setup prompt (Desktop MCP setup). The documented automatic-registration list names Claude Code, Codex, Hermes Agent, WorkBuddy, and Antigravity; use the generic connection instructions for Cursor.
Cursor’s MCP configuration documentation defines two locations:
- Global (
~/.cursor/mcp.json): Makes the configured server available across your repositories. - Workspace (
.cursor/mcp.json): Scopes it to one project.
Use the server entry provided by ChatCut’s setup instructions under mcpServers, preserving its actual server identifier, command, and any args or env values. Do not replace an existing configuration or add a duplicate entry. Cursor’s documented local-server fields include type: "stdio" and command; config interpolation supports ${userHome}, ${env:NAME}, and ${workspaceFolder}. Take the launcher path from your installed app’s setup instructions instead of guessing it.
Check Customize in the Cursor sidebar to confirm the connection is enabled (Customize Cursor), then start a new Agent chat. Test it with a read-only request before editing:
Using ChatCut from the Cursor CLI (agent and cursor-agent)
If you prefer staying in your terminal—or scripting repeatable rough-cut passes—Cursor’s command-line agent supports the same configured MCP servers as the editor. Installing the Cursor CLI (curl https://cursor.com/install -fsS | bash on macOS or irm 'https://cursor.com/install?win32=true' | iex in Windows PowerShell) provides the agent command. The macOS installer also creates the legacy cursor-agent alias under ~/.local/bin; the Windows installer uses Windows launchers, not that Unix directory.
According to Cursor’s CLI MCP documentation, the CLI shares the same mcp.json discovery order (project → global → nested) as the editor. In the second command, replace <identifier> with the ChatCut server name shown by the first:
# Check the configured server names and connection status
agent mcp list

# Inspect every timeline, caption, and export tool ChatCut exposes
agent mcp list-tools <identifier>

# Run a non-interactive read check with MCP tool calls pre-approved
agent -p "Read my open ChatCut Desktop project and summarize its timeline duration" --approve-mcps
Four Cursor-specific habits that make video edits cleaner
- Automatic ChatCut Skills discovery. ChatCut Desktop writes its bundled
chatcut-*editing and Motion Graphics guides into~/.agents/skills/(ChatCut Desktop docs). Cursor automatically discovers user-level Agent Skills from~/.agents/skills/and~/.cursor/skills/—and you can attach one manually by typing/in Agent chat or lock it on as a Custom Mode withOption+Enter(Alt+Enteron Windows). @-mention repo files alongside footage. When cutting a changelog video or tutorial, reference@CHANGELOG.md,@README.md, or@package.jsonin your prompt so Cursor verifies exact feature names, version numbers, and spelling before building captions and callouts.- Plan before changing a long recording. Plan Mode (
Shift+Tab) supports a reviewable plan. Provide an existing transcript and ask for a timestamped cut sheet; do not assume this mode can run a transcription job or guarantee that external tools cannot mutate a project. The CLI also supports/plan. - Remember that Cursor Checkpoints do not undo MCP timelines. Clicking Restore Checkpoint in Cursor reverts workspace code files only (Cursor Agent Checkpoints); it does not roll back external tool calls on a ChatCut timeline. Before trying an experimental cut in ChatCut Desktop, click Versions → Save Current Version in ChatCut’s top bar instead.
Why should you split an agent edit into A-Roll and B-Roll passes?
For this walkthrough, we use two passes:
- A-Roll (Steps 1 to 4) builds the spoken spine: importing and transcribing your recording, cutting retakes and dead air, locking word-level captions, and adding emphasis punch-ins.
- B-Roll and finishing (Steps 5 to 8) layers visuals and sound onto that locked timing: animated titles, Motion Graphics lists, generated cutaway footage, ducked music, and aspect-ratio exports.
Reviewing the spoken cut first reduces later timing revisions to titles, B-roll, and music. Ask explicitly for a quote and approval before paid generation; splitting requests into turns is an organizational choice, not a billing safeguard by itself.
How do you edit a video step by step from the Cursor Agent?
In our master run, we started with mg-teaser.mp4, a 2-minute 48-second (168.167s, 5,045 frames at 30 fps, 1920×1080) talking-head recording shot in a sunlit wood-beamed attic, complete with restarts, filler words, and long thinking pauses. Steps 1 through 4 lock the A-Roll; Steps 5 through 8 add B-Roll, music, and dual 16:9 + 9:16 exports.
Step 1: Import your local take and transcribe speech
With a blank project open in ChatCut Desktop, ask the agent to bring in the raw recording and generate a word-timed transcript:
You: Import this clip into ChatCut and transcribe it.
Cursor: Imported mg-teaser.mp4 (2m 48s, 1920×1080 at 30 fps) onto the timeline and completed cloud speech transcription. Ready for your rough-cut brief.
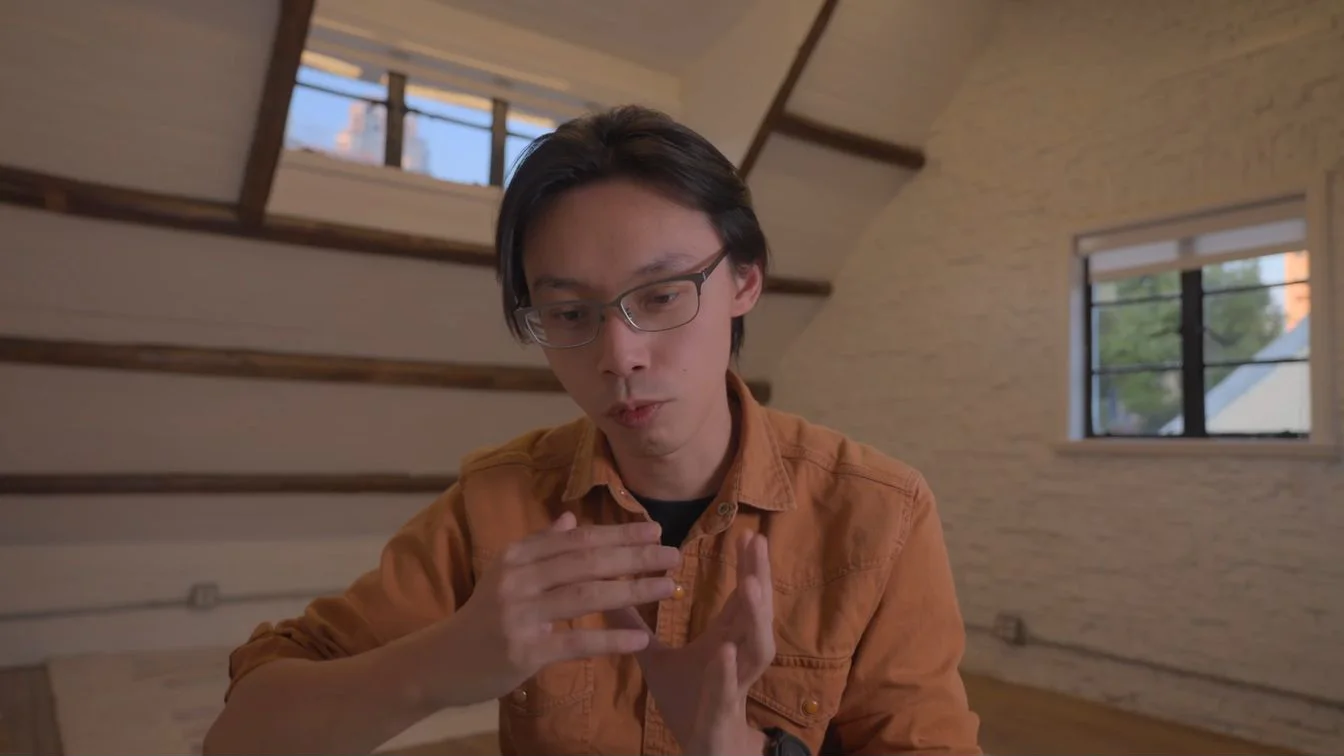
In this master project, importing the local file and completing cloud transcription took 38 seconds and 0 ChatCut credits, mapping all 5,045 frames to word-level timestamps ready for text-based video editing.
Step 2: Cut a clean 60-second A-Roll spine
Next, give a concrete target duration (60 seconds) and tell the agent to strip verbal clutter while preserving the core argument:
You: Make a clean 60-second 16:9 cut: remove filler words, false starts, repeated lines and long pauses. Keep the main argument.
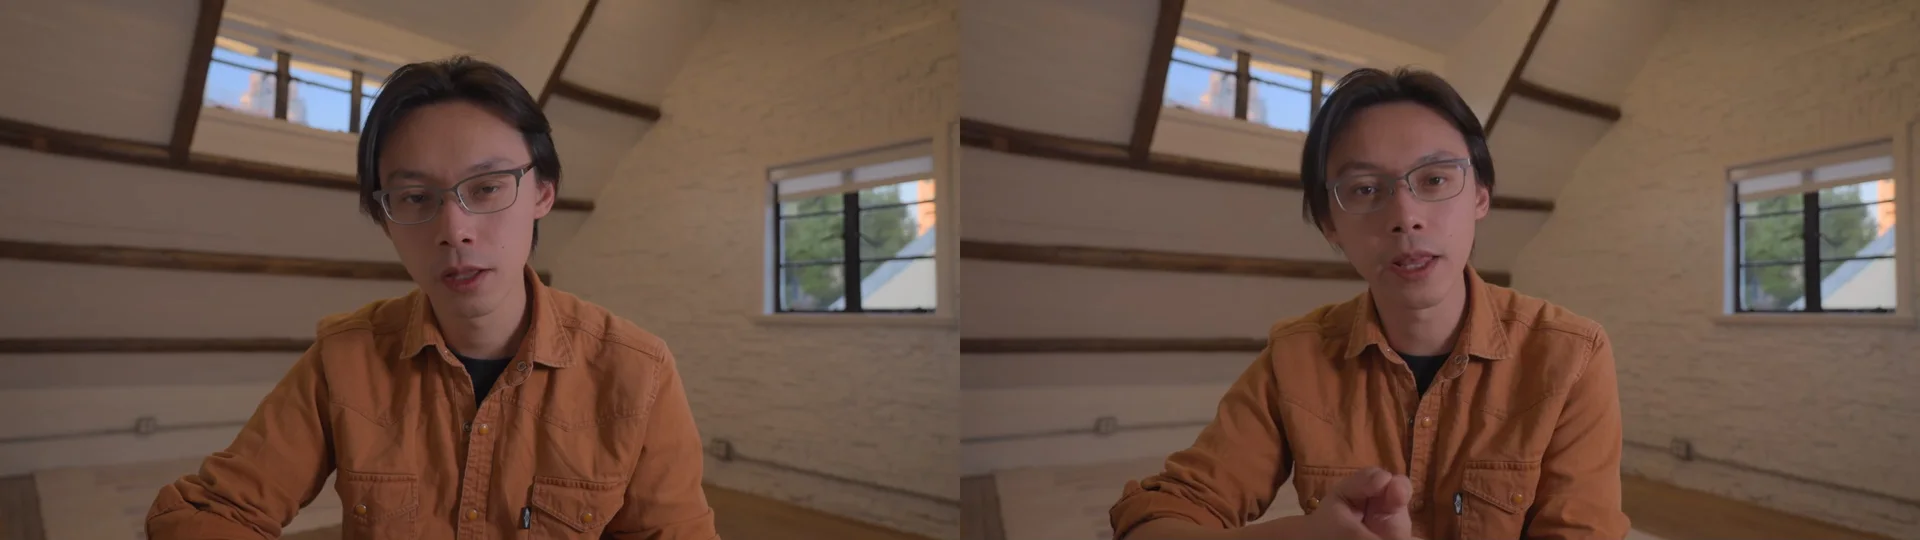
Cursor: Cut the 168.2s recording down to an exact 60.0-second 16:9 timeline (1,800 frames) across 8 clean segments. Removed 7 filler words, dropped repeated takes, and tightened three long pauses while keeping your intro, all three product improvements, and your closing.
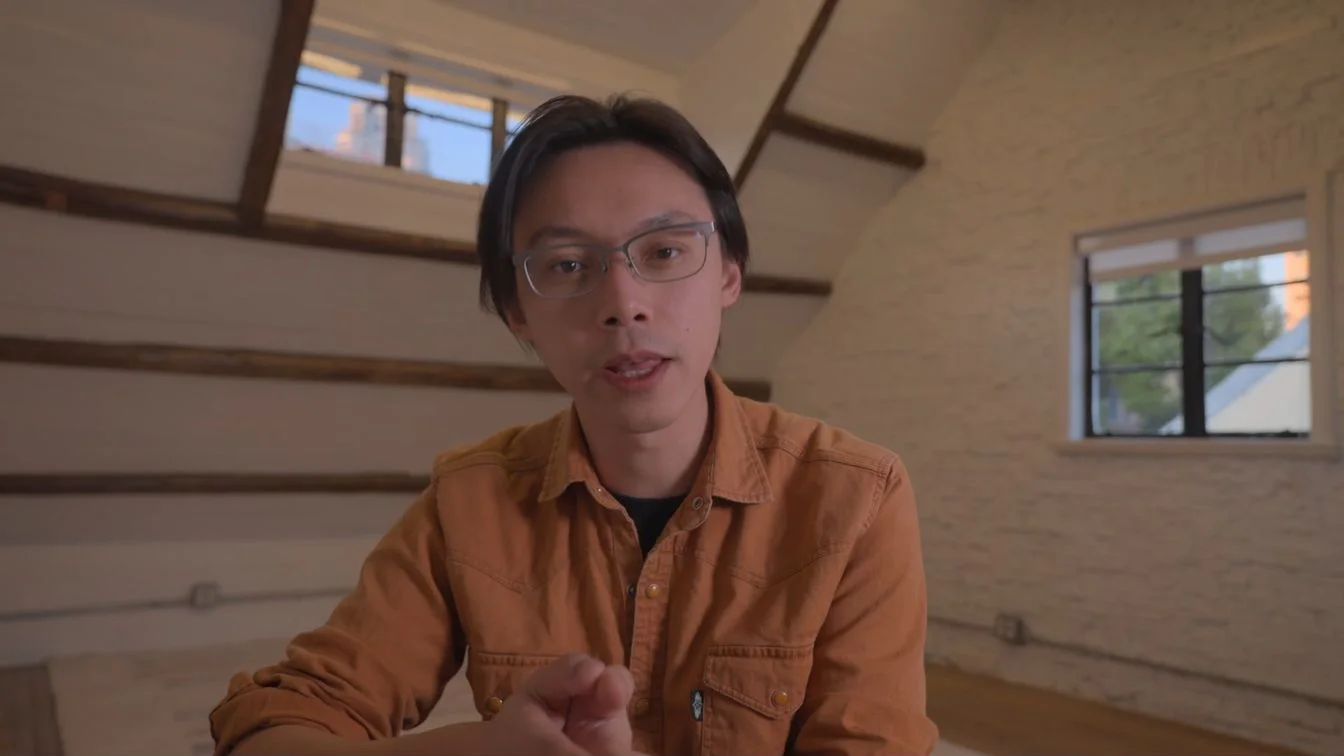
In this master project, 1 minute 33 seconds (0 ChatCut credits) covered a two-pass trim: first stripping 7 spoken fillers (4× "uh", 2× "um", 1× "ah", removing 2.07 seconds), then selecting the strongest takes for the intro, the three release pillars (Stability + performance, A redesigned UI, and AI Motion Graphics), and the outro. When that semantic pass landed at 66.43 seconds, it compressed three lingering pauses (1.60s → 0.35s, 2.16s → 0.40s, and 4.40s → 0.97s) to hit exact frame 1,800 (60.000s).
Step 3: Add word-by-word captions with active-word highlighting
Once the spoken timing is locked, add AI captions styled for quick scanning without covering the speaker’s face:
You: Add word-by-word captions: bold white text, the spoken word highlighted in orange, placed in the lower third.
Cursor: Added bold white Arial 800 lower-third captions (64 px) with an HTML template that highlights only the currently spoken word in orange (#FF9B40), and fixed two 'Checkout' transcript mishearings to 'ChatCut'.
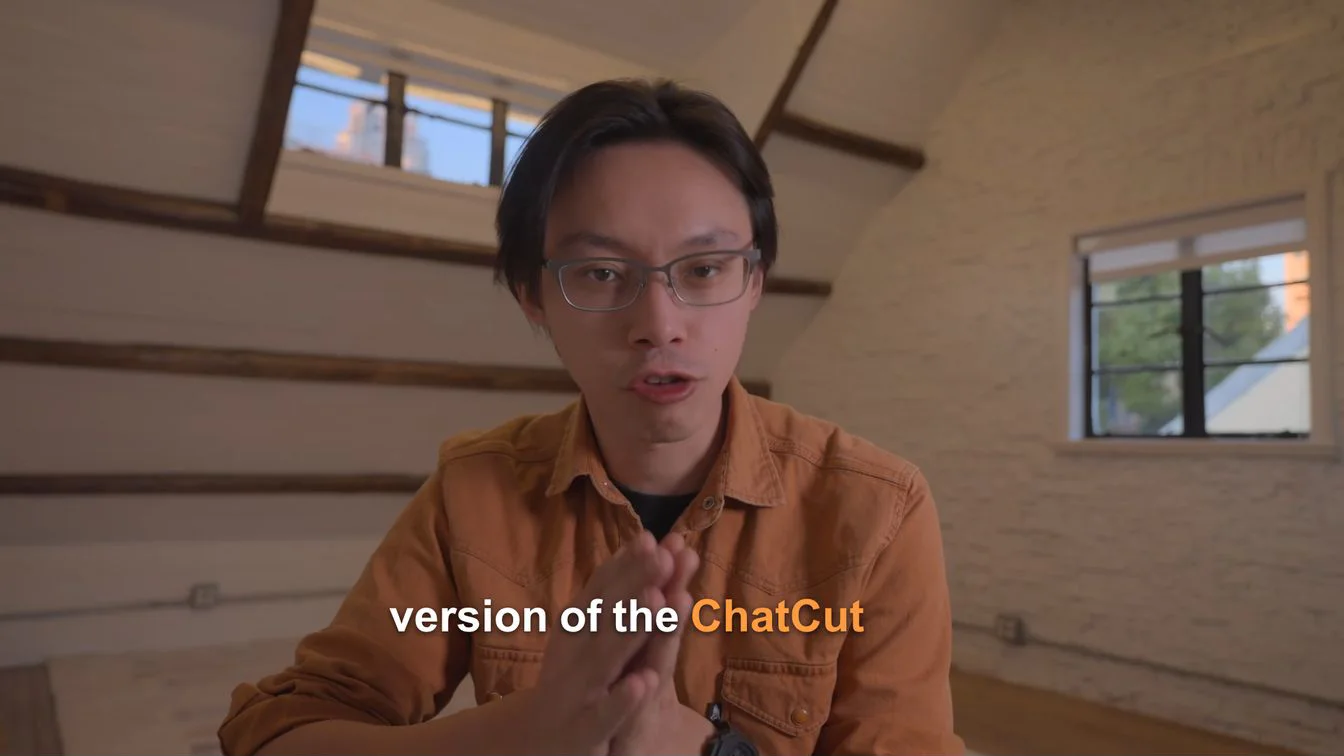
This master-project pass finished in 1 minute 6 seconds at 0 ChatCut credits. Two details from the real run are worth noting: first, the agent authored an editable HTML caption template tied to each word’s exact start and end timestamps so previously spoken words return to pure white instead of staying orange; second, it caught two places where speech-to-text heard “ChatCut” as “Checkout” and fixed the display text without altering the audio cut. For readability and timing fundamentals, the W3C WAI captions guide is a solid checklist.
Step 4: Place punch-in zooms and a subtle transition whoosh
To keep a single-camera 60-second talk from feeling flat, ask for restrained scale changes on key beats plus a quiet sound cue from ChatCut’s built-in library:
You: Add two punch-in zooms on the key lines and a subtle whoosh where the topic changes.
Cursor: Added 1.18× spring punch-in zooms on your first and third pillars (09.3s–12.7s and 38.5s–42.4s) and placed 'Airy Short Whoosh' from the sound library at −14 dB on the topic transition at 36.4s.
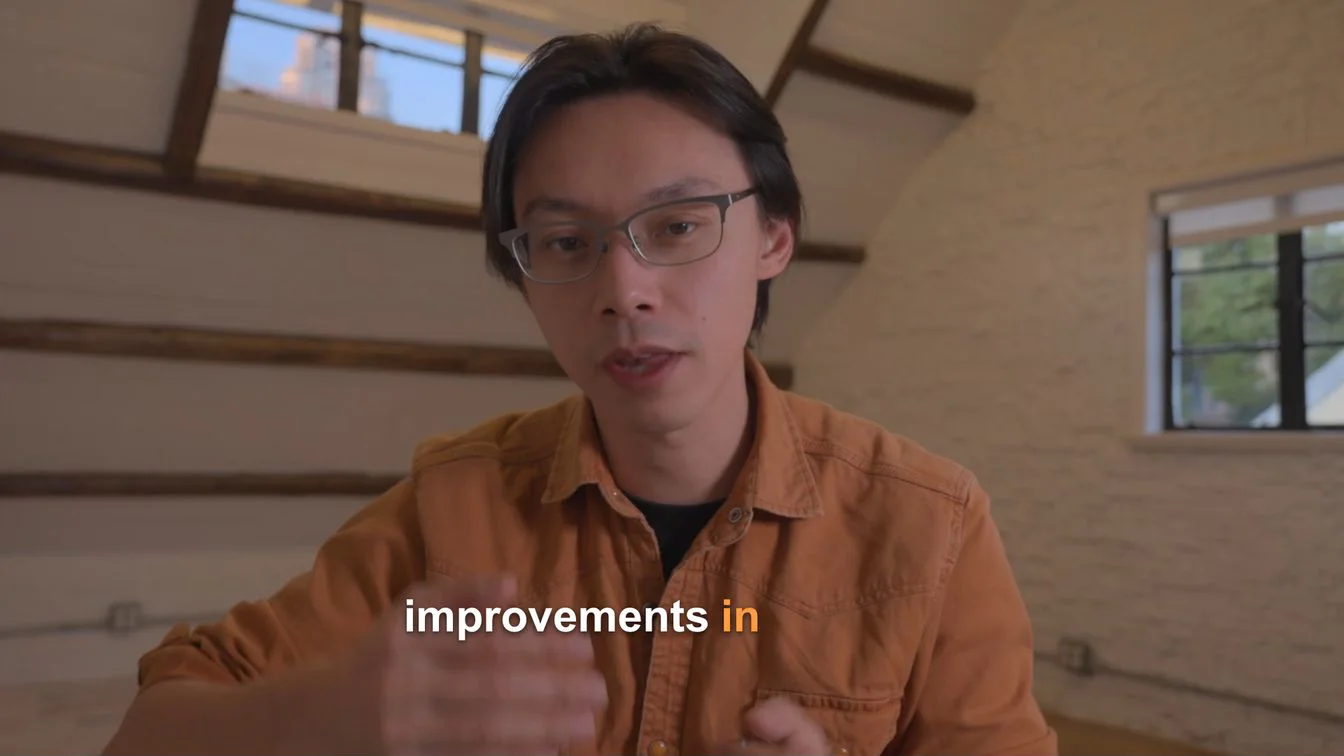
In this master project, built-in timeline framing and library audio took 25 seconds and 0 ChatCut credits—completing the A-Roll spine.
Step 5: Build an animated title and a three-point Motion Graphics callout
Now the B-Roll pass starts. Because ChatCut’s AI Motion Graphics are code-driven HTML overlays on their own track rather than baked-in pixels, an agent can match your speaker’s palette and position cards into open negative space at 0 ChatCut credits:
You: Add a 3-second animated title at the start and a Motion Graphics callout that lists the three points I make.
Cursor: Placed a 3-second animated title ('Make ideas move.' under 'CHATCUT · THE NEW RELEASE') from 0:00 to 0:03, plus a staggered 'THREE IMPROVEMENTS' callout card from 0:07.5 to 0:13.5 in the upper-right wall space.
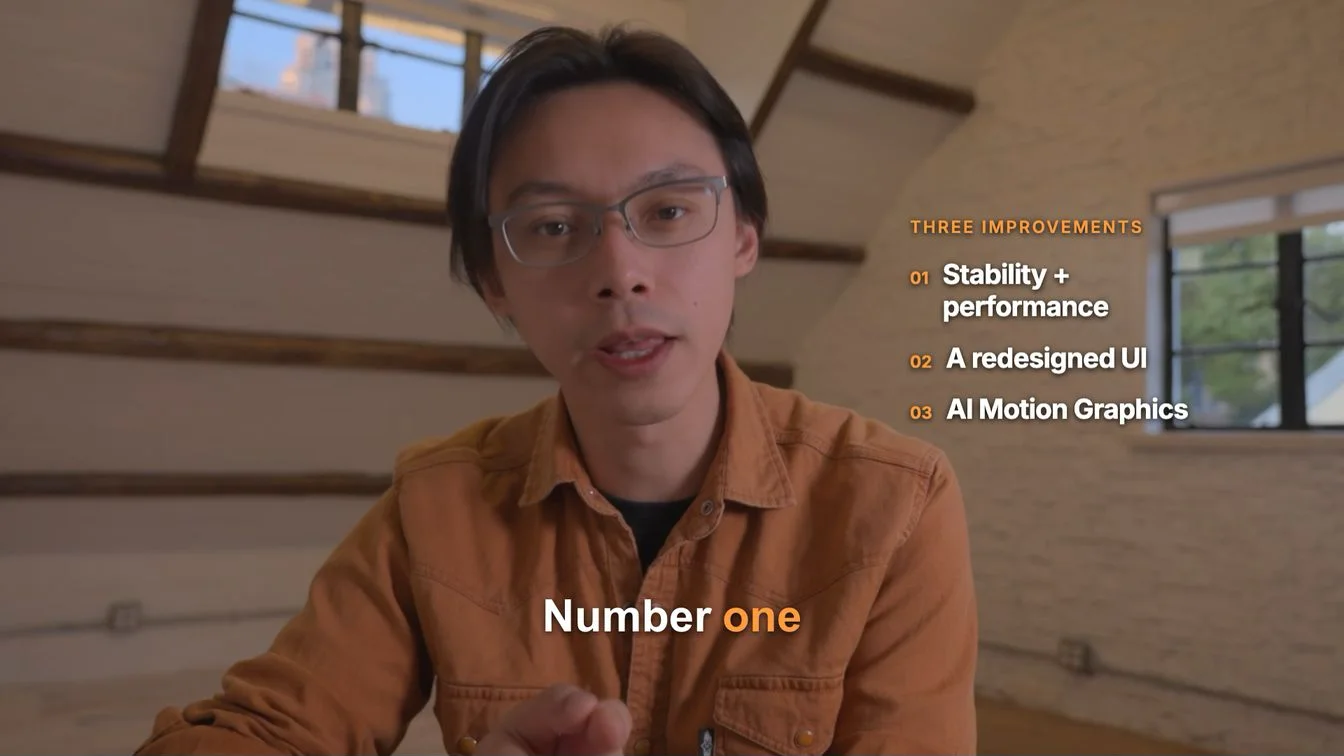
In this master project, authoring and checking entry, hold, and exit frames for both overlays took 1 minute 51 seconds and 0 ChatCut credits:
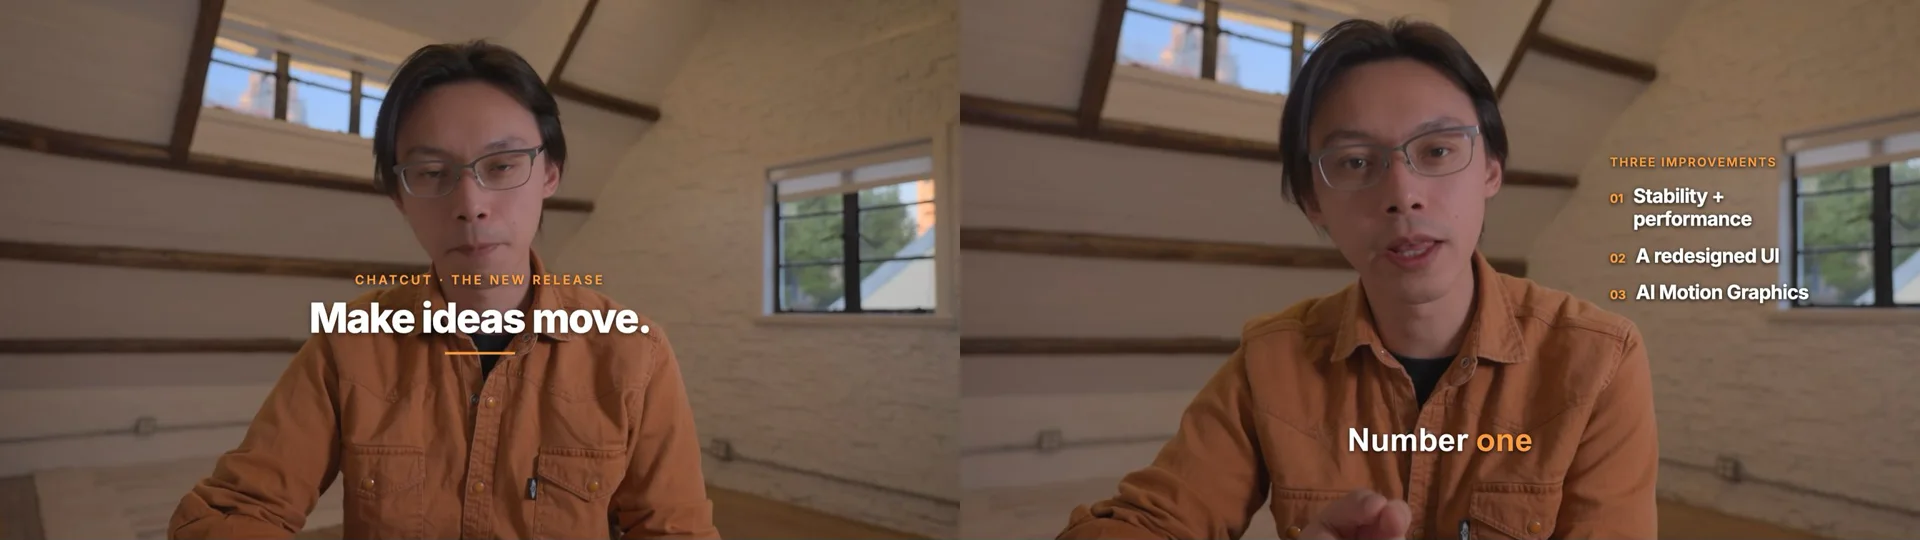
Step 6: Quote credits first, then generate one AI B-Roll cutaway
When you mention a visual idea you never filmed, ChatCut’s AI video generator (available on paid plans) can synthesize a cutaway right inside the project. Always instruct the agent to report the credit estimate first:
You: Generate one short B-roll shot that fits what I'm describing and place it over one line. Tell me the credit cost first.
Cursor: The final 4-second, 720p, 16:9 Seedance 2.5 cutaway cost 4.38 ChatCut credits. It slowly pushes toward a monitor on a wooden desk in a warmly lit attic, showing a large orange square and five color blocks on a dark gray screen—an abstract illustration, not a real software interface or a complete multi-track timeline. Removing garbled screen text took 3 generations totaling 13.14 credits. Placed the final clip over 42.5s–46.5s with its audio muted so your voice and captions stay uninterrupted.
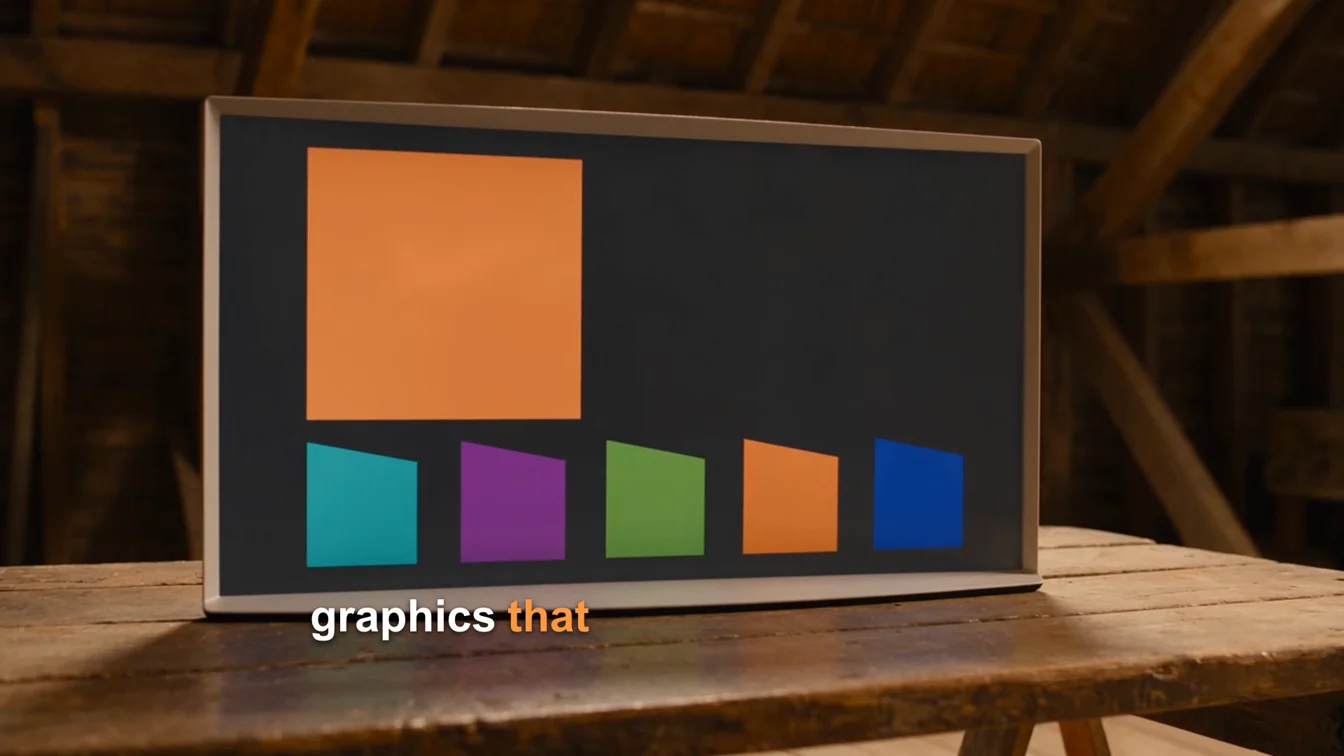
In the original master run, quoting, cloud video generation, and timeline placement took 5 minutes 29 seconds; that timing excludes the later rework. The clip used in the finished edit cost 4.38 ChatCut credits. To remove garbled screen text, this shot was generated 3 times (the original plus two retries), totaling 13.14 ChatCut credits; all other steps used 0 ChatCut credits. Host-agent fees were not measured. The final slow push-in shows a monitor on a wooden desk in a warmly lit attic: a large orange square above five color blocks (cyan, purple, green, orange, and blue) on a dark gray screen. This is an abstract illustration, not a real software interface or a complete multi-track timeline. The final version passed frame-by-frame inspection after the prompt explicitly excluded text, letters, logos, and UI labels. Use real screen recordings whenever viewers need to read interface text.
If a video render is still running after a couple of minutes, never resend the generation prompt (which submits a second paid job). Check the existing task safely instead:
Step 7: Layer ambient music with automatic voice ducking
To smooth out the eight spoken edits without spending generation credits, the agent pulled ViraMiller’s royalty-free CC BY 4.0 track Relaxing Ambient Melodies, trimmed it to 60 seconds with a 1.5-second fade-in and 2.0-second fade-out, and linked automatic ducking (VO = anchor, Music = follower) while keeping the Step 4 whoosh independent:
You: Add a calm music bed and duck it under my voice.
Cursor: Placed a 60-second CC BY 4.0 ambient music bed with a 1.5s fade-in, 2.0s fade-out, and speech-triggered auto-ducking. Full 60s rendered mix measures −20.3 LUFS integrated loudness and −2.0 dBFS peak (0 credits).
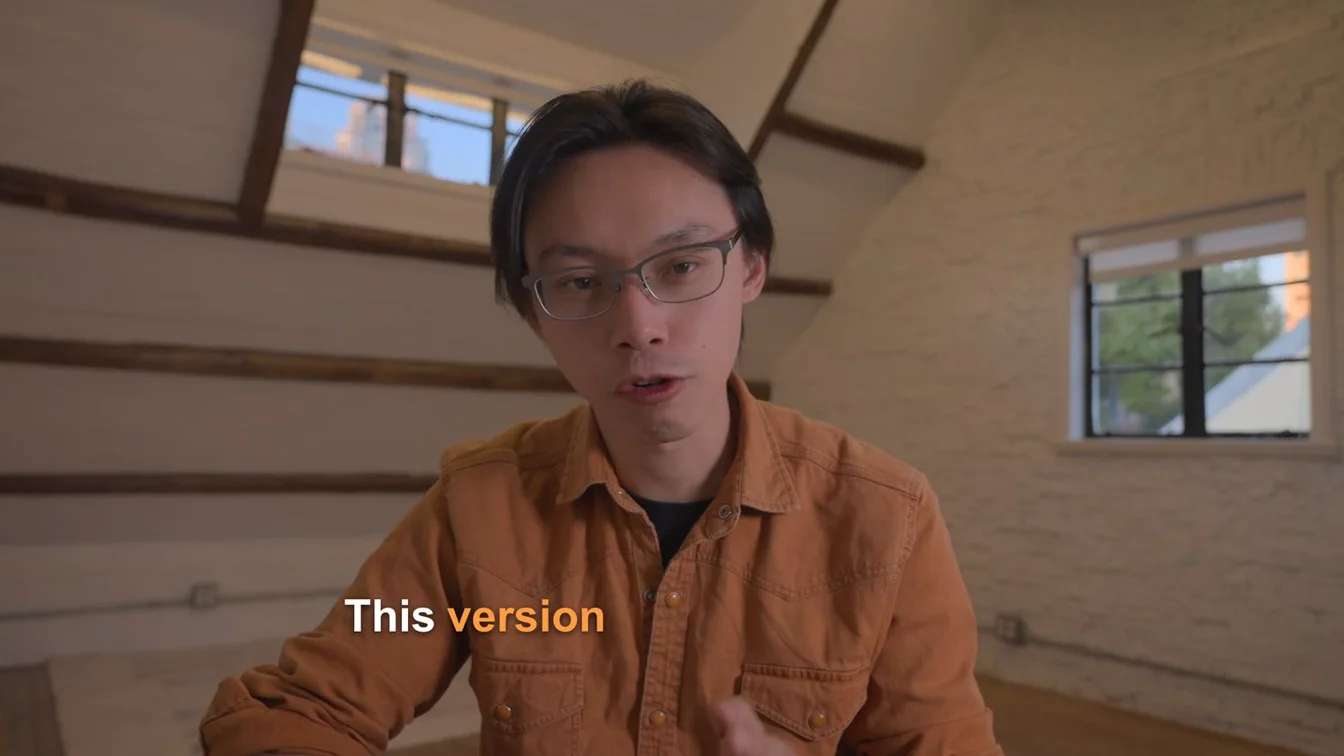
In this master project, audio setup and stem verification finished in 50 seconds at 0 ChatCut credits (if you prefer generating a custom instrumental track instead, ChatCut’s AI music is listed at roughly 0.2 credits per instrumental track in the Credits policy; check your account eligibility and live estimate first).
Step 8: Export 1080p 16:9 and reframe a 9:16 vertical Short
Finally, we asked for the horizontal 1920×1080 MP4, then immediately turned the same cut into a 1080×1920 vertical Short on a second timeline (Shorts · 9x16):
You: Export a 1080p 16:9 MP4.
Cursor: Exported final-16x9.mp4 locally (60.0s, 1920×1080, 30 fps H.264/AAC, 94.6 MB, 0 credits).
You: Now make a 9:16 vertical version for Shorts from the same edit, keeping the speaker centered, and export it too.
Cursor: Duplicated the edit to a 'Shorts · 9x16' timeline, centered your framing, resized the opening title and three-point callout for vertical screens, letterboxed the 16:9 monitor B-roll over a darkened (−3 EV) backdrop so neither side is cropped off, and exported final-9x16.mp4 (1080×1920, 30 fps, 92.2 MB, 0 credits).
Reframing a 16:9 edit to 9:16 Shorts is more than a center crop: naive vertical scaling clips wide Motion Graphics and slices off the left and right edges of a horizontal monitor shot. Repositioning the two graphic layers independently and placing the 16:9 cutaway over a -3 EV darkened background copy kept every element legible inside 1080×1920:
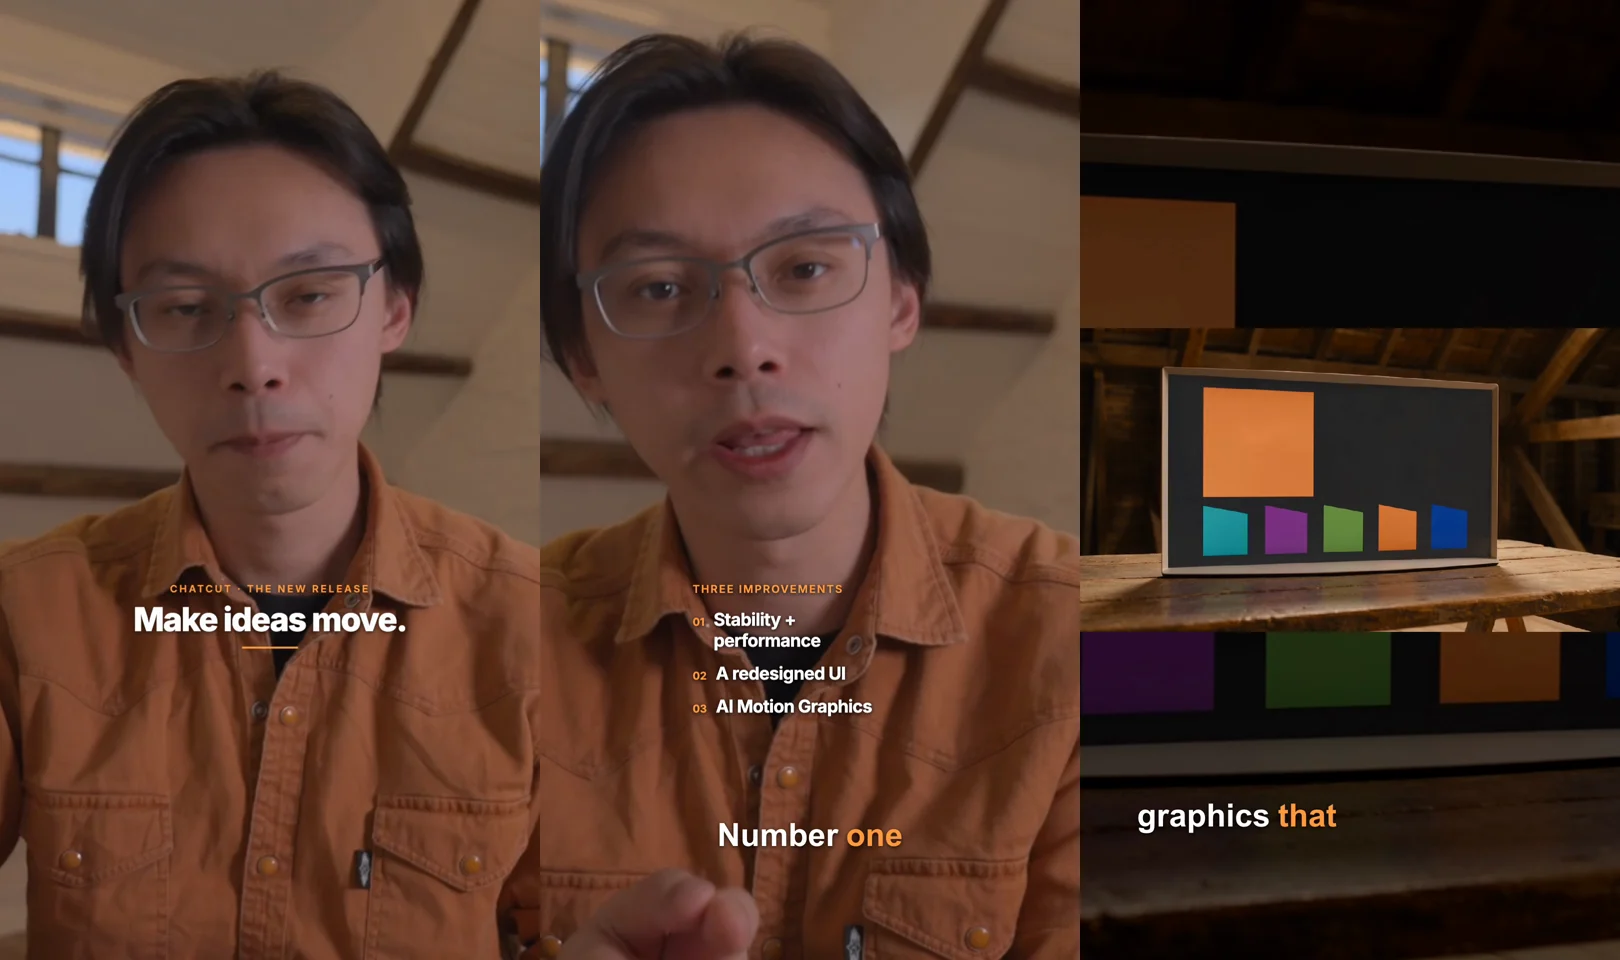
Here is a 720×1280 web copy of the 1080×1920 vertical master exported at the end of Step 8:
What were this master project’s timing and ChatCut charges?
| Step | Timeline change in ChatCut Desktop | Recorded master-step time | ChatCut credits |
|---|---|---|---|
| 1. Import & transcribe | Imported 168.2s 1080p clip (5,045f) and ran cloud speech transcription | 0:38 | 0.00 |
| 2. 60s rough cut | Removed 7 fillers + retakes, compressed 3 pauses to exact 60.0s (8 segments) | 1:33 | 0.00 |
| 3. Word-by-word captions | Bold white Arial 800 lower-third captions, active word #FF9B40, fixed 2 spellings | 1:06 | 0.00 |
| 4. Zooms & whoosh | Two 1.18× spring punch-ins + library Airy Short Whoosh at -14 dB | 0:25 | 0.00 |
| 5. Motion Graphics | Authored 0–3s opening title + 7.5–13.5s 3-point callout layer | 1:51 | 0.00 |
| 6. AI B-Roll cutaway | Quoted first, then generated & muted 4s 720p Seedance 2.5 shot (42.5–46.5s) | 5:29 | 4.38 final clip; 13.14 across 3 generations to remove garbled screen text |
| 7. Music & ducking | Added 60s CC BY 4.0 ambient bed, fades, auto-ducking (-20.3 LUFS mix) | 0:50 | 0.00 |
| 8. 16:9 + 9:16 exports | Local 1080p 16:9 MP4 + reframed Shorts · 9x16 timeline & 1080p MP4 | 1:50 | 0.00 |
| Total | One 2m 48s raw take → finished 16:9 + 9:16 1080p MP4s | 13:46 | 13.14 including B-roll retries; 4.38 for the final clip |
The eight step durations add to 13:42. The 13:46 total is the recorded wall-clock window, including four seconds between steps, tool waits, and checks. Preparation, post-export verification, and the later B-roll rework are outside that window; the step times remain those of the original master run, while the credit totals include the B-roll retries. These figures describe this master project, not a Cursor benchmark or a promise for another edit.
Which copyable prompts work best for Cursor video editing?
Once connected and given access to the relevant files, Cursor can combine @ repository context with clear timeline boundaries. For more general templates, browse our video editing prompts library.
1. Cut a release video against @CHANGELOG.md
2. Audit a technical tutorial against @docs/ before editing
3. Give reusable style and budget instructions via .cursor/rules
Cursor documents project rules as .mdc files in .cursor/rules. A budget instruction guides the agent; still check the quote before approving a generation.
4. Clean up a talking-head recording (0 ChatCut credits)
5. Turn a long podcast or interview into 9:16 Shorts
6. Sync a screen demo with voiceover and step callouts
7. Make one surgical timing fix without shifting overlays
What do you still need to review by hand before publishing?
Before publishing, review five things in ChatCut Desktop and in your media player:
- Brand names, CLI flags, and capitalization in captions. The master edit corrected two brand-name transcriptions. Check the displayed captions against the audio, especially product names and commands, before publishing.
- Screens and signs inside AI-generated B-roll. Generated screens and signs commonly contain garbled text. Specify
no text, no letters, no logosand no UI labels, inspect the result frame by frame, and budget credits for retries. This shot took 3 generations totaling 13.14 credits; the final 4.38-credit clip passed inspection with only an orange square and five color blocks on its screen. Use real screen captures whenever viewers need accurate UI labels, terminal output, or code. - 9:16 overlay sizing and horizontal B-roll edges. Always scrub vertical adaptations at entry, hold, and exit frames to confirm titles, bullet callouts, and wide cutaways were resized for 1080×1920 rather than clipped at the edges.
- Full headphone playback across every cut. The master record includes ducking settings, rendered stems, a -20.3 LUFS full mix, and a -2.0 dBFS peak. Full subjective headphone playback was not completed; measurements do not establish whether every cut sounds natural. Play the exported MP4 outside the editor from 0:00 to the end.
- Rights, music attribution, and synthetic-media disclosure. Keep required Creative Commons credits when publishing CC BY tracks, and follow platform policies such as YouTube’s altered or synthetic content disclosure rules when realistic generated footage appears.
How do you fix common Cursor MCP and ChatCut setup issues?
ChatCut tools do not appear in Cursor Agent chat
First, confirm you have launched ChatCut Desktop at least once and signed in inside the ChatCut window. Next, open Customize in the Cursor sidebar (or run agent mcp list in a terminal) to verify the ChatCut connection is enabled, then open a new Agent chat—MCP tool catalogs load when a session starts, so the chat where you ran the installer will not have them yet (Install ChatCut for AI Agents).
Cursor’s Output panel shows MCP Logs spawn or path errors
Press Cmd+Shift+U (Ctrl+Shift+U on Windows) in Cursor and select MCP Logs from the Output dropdown (Cursor MCP debugging). If the configured launcher is missing, open ChatCut Desktop once and refresh the connection using Connect any agent. Copy the actual path and launch settings supplied by the app, then check that Cursor’s configuration matches them.
Tools fail inside a Cloud Agent, Remote SSH window, or Linux machine
This setup uses a local stdio connection with the native ChatCut Desktop app on macOS 13+ or Windows 10+ x64. A hosted Cursor Cloud Agent or a server running in a Remote-SSH workspace does not automatically share the MCP connection on your computer. A Linux machine cannot run ChatCut Desktop. Run video-editing sessions in a local Cursor window on the computer holding your footage (Edit a Desktop Project from Your Agent).
Cursor interrupts every timeline action for manual approval
Cursor’s Run Modes determine when MCP tool calls require approval (Run Modes). Open Settings → Agents → Approvals & Execution in Cursor and choose Auto-review or add trusted ChatCut read/timeline tools to your Allowlist (or pass --approve-mcps in scripted CLI runs)—while still instructing the agent in your prompt to ask before spending ChatCut generation credits.
How was this guide verified?
ChatCut Inc. publishes this guide. Cursor’s configuration locations, interpolation variables, CLI commands, Skills directories, Run Modes, and current pricing were checked against its linked official documentation on November 18, 2026. The edit is documented by a separate real ChatCut Desktop master run driven by Codex, with native preview frames, exported files, and a 4.38-credit charge for the final 4-second 720p Seedance 2.5 clip. Removing garbled screen text required 3 generations totaling 13.14 credits for this shot, with all other steps at 0 credits. The original 13:46 work window includes waits and checks but excludes the later B-roll rework; host-agent costs were not measured. The Cursor chat panels are illustrative reconstructions using the recorded prompts and summarized results. Cursor’s end-to-end execution, subjective full-length audio review, and final user acceptance were not independently verified in this article.
Questions about editing video with Cursor and ChatCut
Can Cursor edit videos directly through MCP?
Where do I put mcp.json to connect ChatCut to Cursor?
Does the Cursor CLI (agent or cursor-agent) work with the same ChatCut MCP setup?
Does Cursor video editing work on Linux or in Cursor Cloud Agents?
How does billing work between my Cursor plan and ChatCut credits?
Do Cursor Checkpoints undo edits made on my ChatCut timeline?
Can I take a Cursor-edited project into Premiere Pro or DaVinci Resolve?
Using a different agent? The same ChatCut edit works from ChatGPT, Codex, Claude Code, Antigravity, Grok Bot, OpenClaw, Hermes Agent, Meta Muse and WorkBuddy; each guide covers that agent’s install and quirks.