WorkBuddy is Tencent’s desktop agent workspace for documents, spreadsheets, presentations, and other everyday tasks. To edit video with WorkBuddy, use WorkBuddy skills and prompts with ChatCut’s AI video editor through the WorkBuddy Web MCP setup guide. You describe the edit in WorkBuddy; ChatCut supplies the multi-track timeline for cuts, captions, Motion Graphics, cutaways, and music, which you can review and adjust in the web editor.
ChatCut is our product. The conversation windows below are code-rendered illustrations of WorkBuddy’s interface. The editing itself was one real shared master project run in ChatCut Desktop by an external Codex agent, using ChatCut’s editing tools. WorkBuddy can direct those editing capabilities with the same prompts after connecting ChatCut; this article documents its hosted Web setup, not a WorkBuddy execution test or a guarantee of identical results across agents. The master run turned a 2-minute 48-second recording into 60-second horizontal and vertical videos, over a 13-minute-46-second recorded operation window, including tool waits and checks, measured for the original M0 run only. The cutaway used in the finished edit cost 4.38 ChatCut credits; removing garbled screen text required three generations in total (the original plus two retries), costing 13.14 credits. All other editing steps cost 0 credits. Setup and later media verification were outside that window, and the host agent’s own cost was not measured. See also how to edit video with ChatGPT and Codex.
What does the finished 60-second edit look like?
Before touching any configuration file, press play on the 60.0-second horizontal MP4 delivered at the end of our eight-prompt sequence, cut from a single 168.2-second (5,045-frame) raw talking-head recording:
Five distinct passes sit on separate editable tracks inside that project:
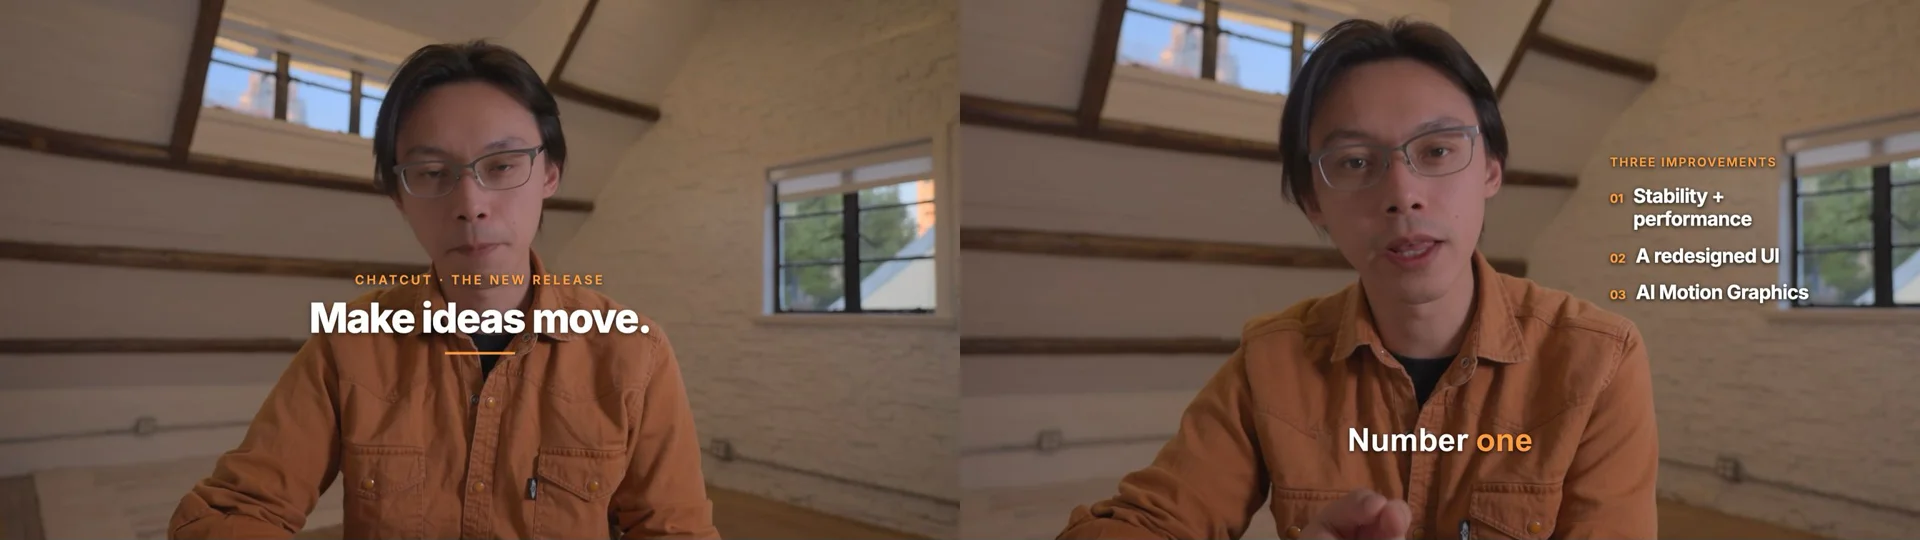
- 0:00 to 0:03: A transparent HTML Motion Graphics opening title (“CHATCUT · THE NEW RELEASE” / “Make ideas move.”) with an expanding warm-orange rule over the presenter.
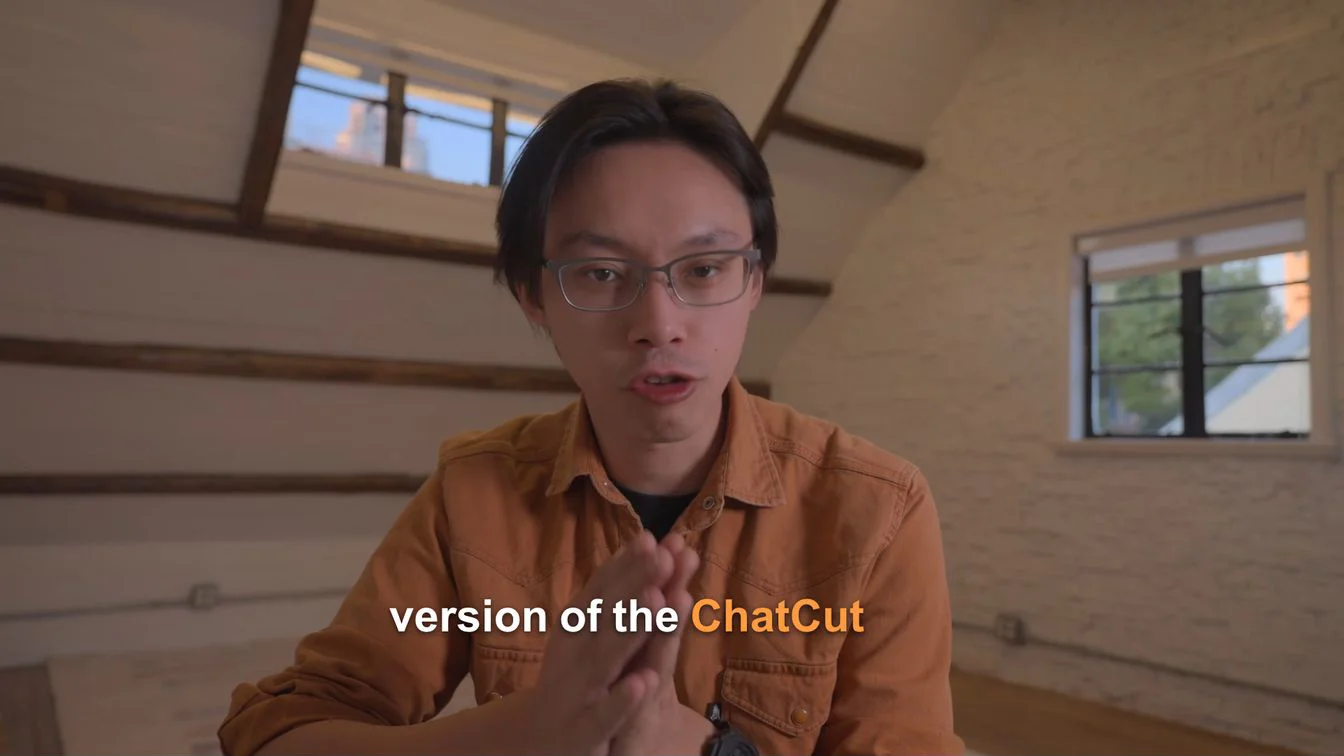
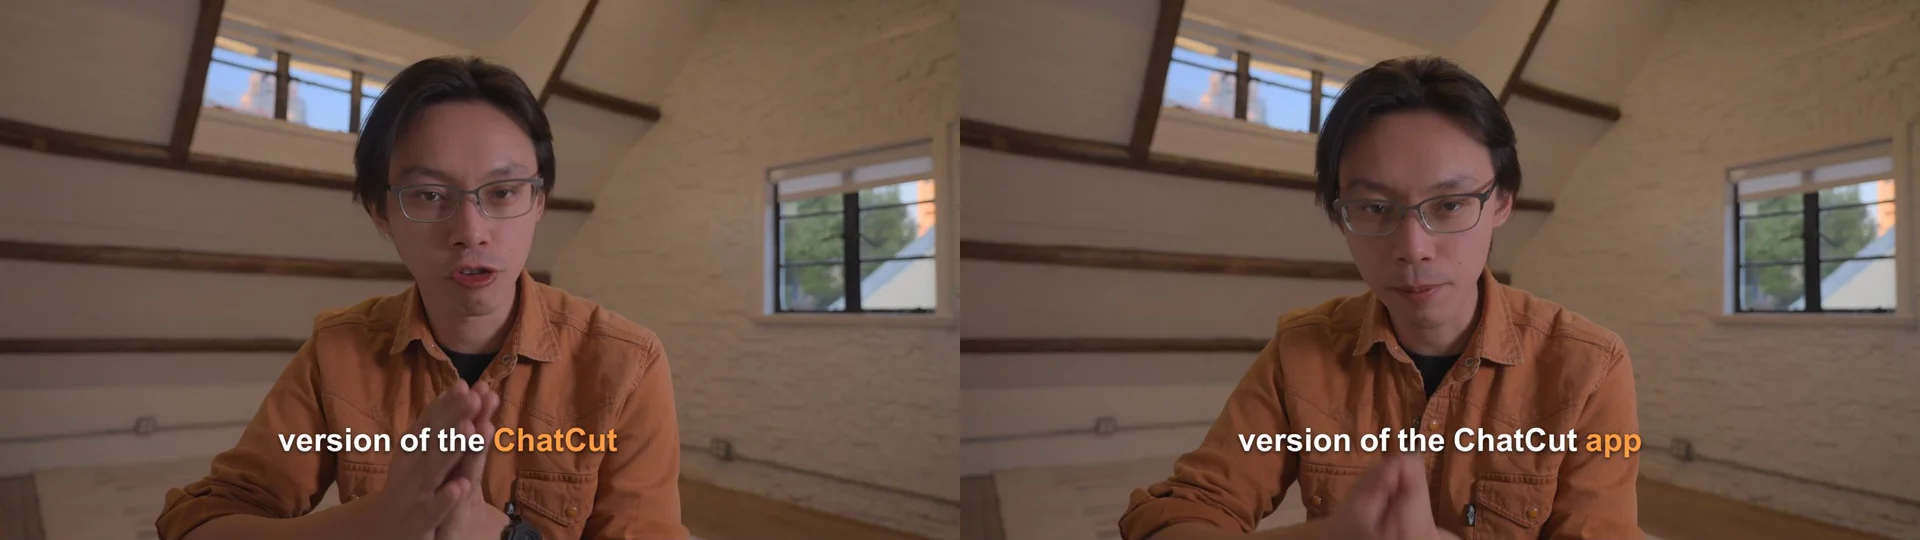
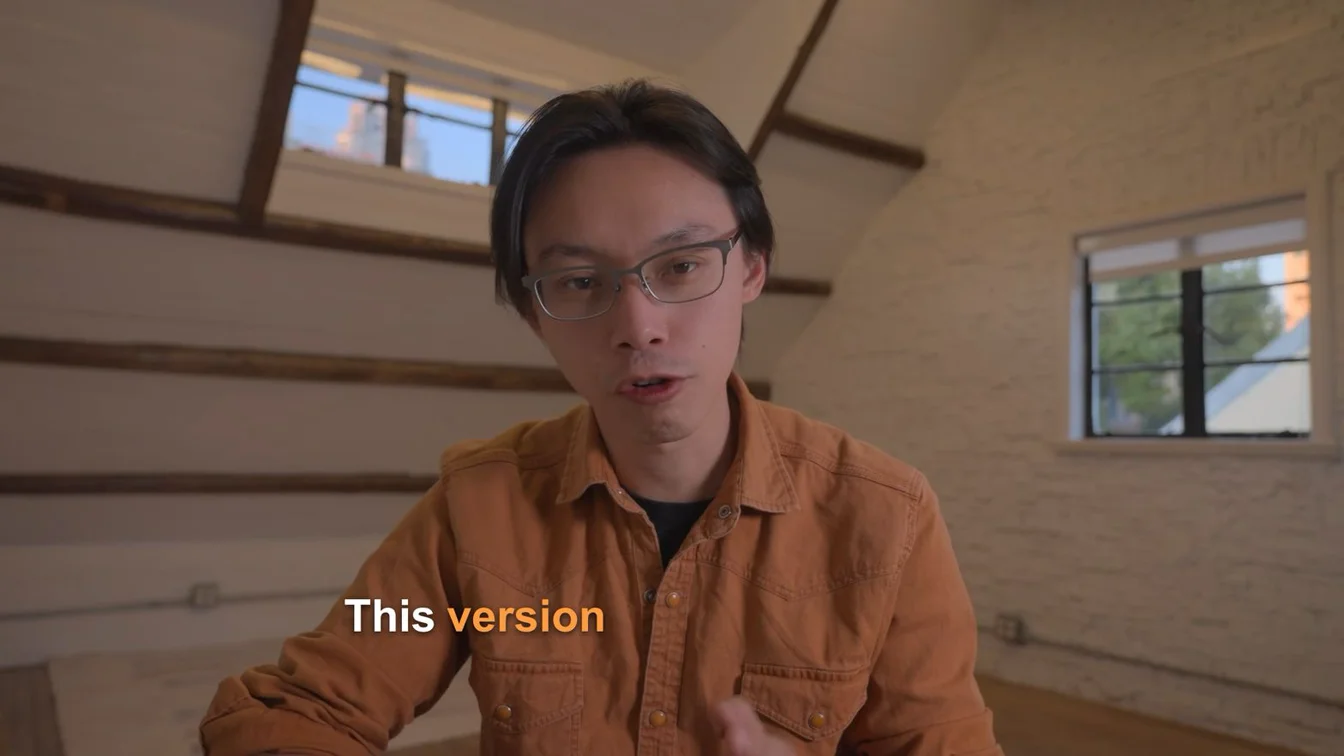
- During speech: Bold white Arial lower-third captions where only the word currently being spoken lights up in orange (#FF9B40) before returning to white.
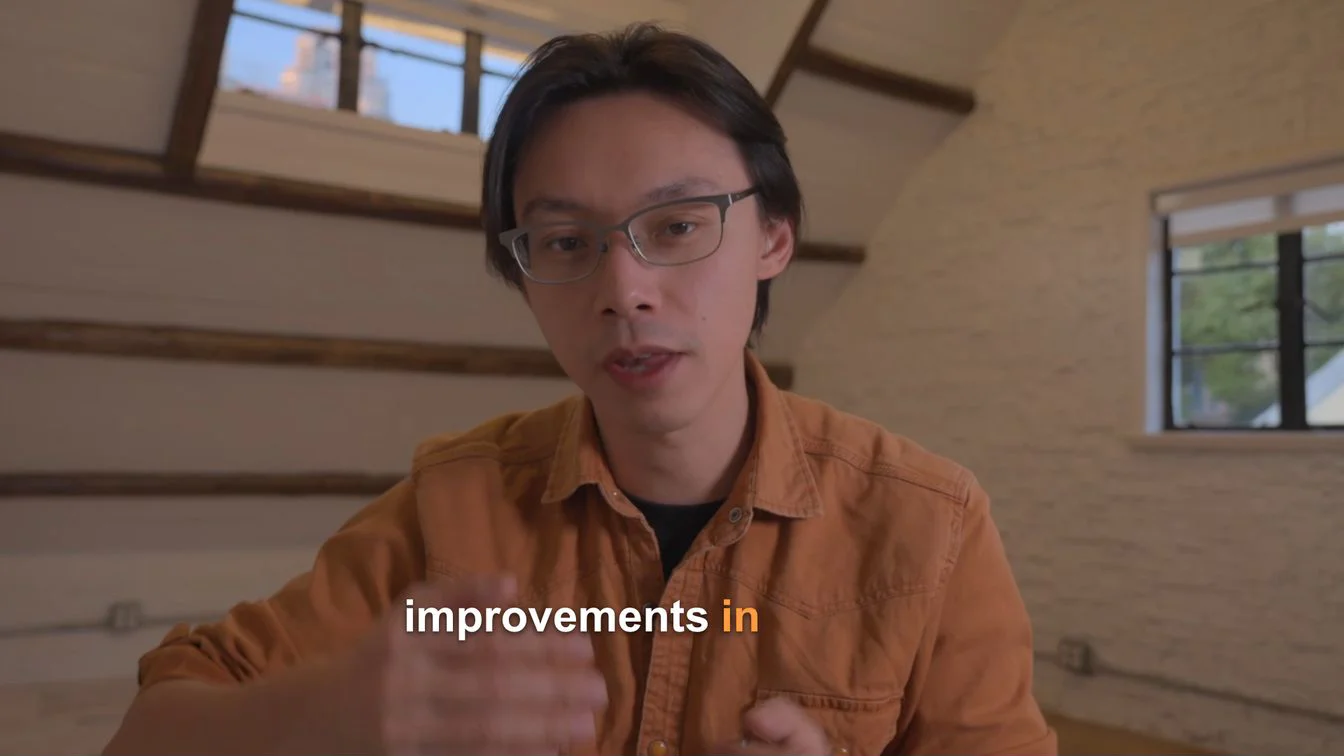
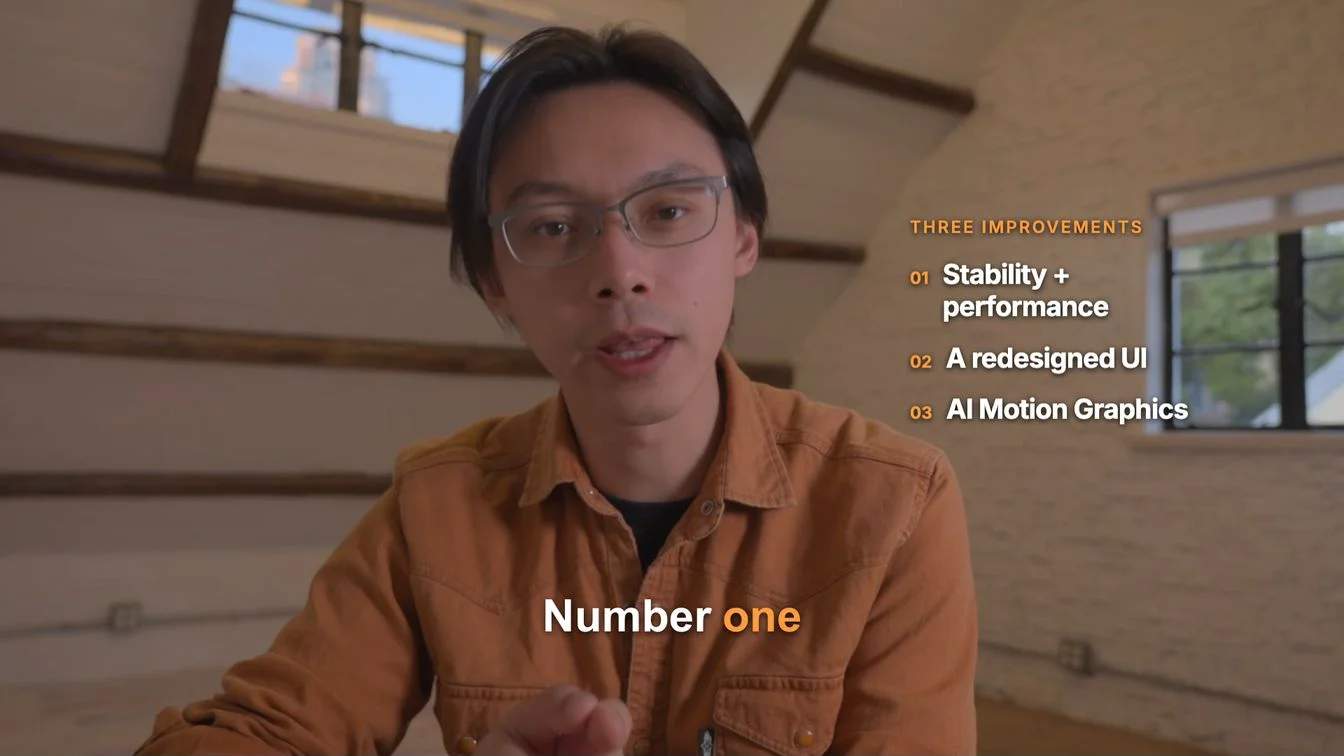
- 0:07.5 to 0:13.5: A staggered three-point callout (“01 Stability + performance”, “02 A redesigned UI”, “03 AI Motion Graphics”) placed over the open brick wall on the right, paired with a 1.18× spring punch-in zoom starting at 0:09.3.
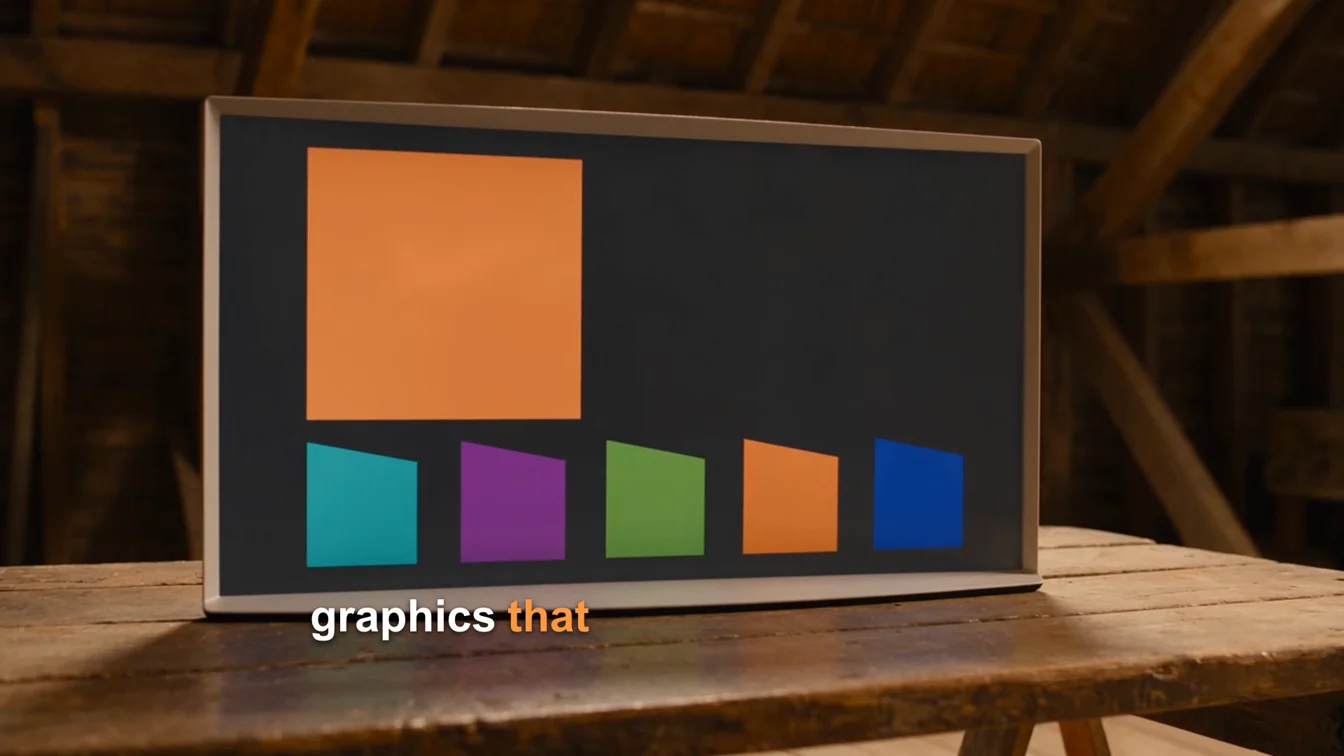
- 0:36.4 to 0:46.5: A quiet -14 dB library whoosh marking the shift to the third topic, a second 1.18× spring punch-in zoom (0:38.5–0:42.4), and a 4-second 720p Seedance 2.5 attic-monitor cutaway showing abstract color blocks (0:42.5–0:46.5; 4.38 credits for the shot used, 13.14 credits across three generations to remove garbled screen text).
- 0:00 to 1:00: A 60-second CC BY 4.0 instrumental ambient track (Relaxing Ambient Melodies by ViraMiller) with a 1.5-second fade-in, voice-triggered auto-ducking, and a 2.0-second fade-out, finishing at -20.3 LUFS integrated loudness.
How do WorkBuddy skills, Connectors, and ChatCut’s Web MCP server fit together?
Built by Tencent, WorkBuddy AI is a desktop agent workspace for everyday office and creative workflows on macOS 12+ and Windows 10+ (x64, ARM64 compatible). Its Quick Start workspace defaults to Daily Office mode (with a one-click toggle to Code Development) and splits the window into three columns: a left sidebar for tasks and extensions, a central conversation thread, and a right-hand Results panel for artifacts, workspace files, changes, and previews.
Because WorkBuddy separates instructions, personas, and external APIs into three menus, knowing which layer handles video saves confusion:
- WorkBuddy Skills (
SKILL.mdworkflow packages): Reusable instruction sets—built-in, installed with one click from the recommended marketplace, or uploaded/created locally (uploaded packages undergo a security check). Skills live in your user configuration folder across all workspaces or inside a single project folder, and the Quick Start guide documents/for invoking skills and commands. On their own, however, local Markdown instructions cannot trim or render timeline video without an editing engine underneath. - Experts and Expert Teams: Domain personas (such as marketing, copywriting, or research leads) that shape how WorkBuddy plans and reviews deliverables, and can divide work among roles; independent steps may run in parallel.
- Connectors and Custom MCP (
~/.workbuddy/mcp.json): Standardized Model Context Protocol (MCP) bridges to external services. Adding ChatCut’s hosted Web MCP server connects WorkBuddy over HTTPS (https://api.chatcut.io/api/external-mcp/mcp) to a live multi-track editor—and automatically exposes your saved and catalog ChatCut Workflow Skills through the MCP connection itself, with no separate.zipskill package to maintain.
Billing also stays cleanly separated between your Tencent WorkBuddy account and your ChatCut account:
| Part of the workflow | Which account covers it | Cost in our 8-step master edit |
|---|---|---|
WorkBuddy planning, tool calls, local file reads, and model routing (Auto, account-dependent built-in models, or custom API / local Ollama models) | Your WorkBuddy plan (Credits guide): Free ($0, 100 base credits/mo), Pro ($10/mo or $96/yr, 2,000 credits/mo: 1,000 base + 1,000 bonus), Team ($40/seat/mo), or your own custom API / Ollama setup | Not measured: the master used Codex, not WorkBuddy. Host reasoning uses no ChatCut credits. |
| Uploading footage, speech transcription, rough cuts, active-word captions, punch-in zooms, library SFX, and agent-authored HTML Motion Graphics | ChatCut Free or Pro plan (Credits policy) | 0.00 ChatCut credits across the master’s Steps 1–5 and Step 7 |
| Browser or cloud MP4, audio, subtitle, and FCP7 XML handoff exports | Browser exports render locally in your signed-in browser at 0 ChatCut credits. Cloud exports include a free allowance; beyond it they follow ChatCut’s current credit rules (see Web vs Desktop Export) | 0.00 ChatCut credits for the master’s two Desktop-local MP4 exports; Web export was not tested here |
| ChatCut-hosted AI video, image, custom music, sound-effect, or voiceover generation | ChatCut credits (Pricing, paid plans from $25/mo for 100 credits, or $252/year; paid plan required for AI video generation and ChatCut image generation) | 4.38 ChatCut credits for the 4-second 720p Seedance 2.5 cutaway used; 13.14 credits for three generations (original + two retries to remove garbled screen text) |
How do you edit a video with WorkBuddy in five quick steps?
- Connect ChatCut’s hosted Web MCP server. Open a task in WorkBuddy and ask it to follow
https://chatcut.io/web-plugin/workbuddy—completing the browser OAuth sign-in, writing~/.workbuddy/mcp.json(no leading dot), and starting a fresh conversation so the MCP tools load. - Import your recording and transcribe speech. Point WorkBuddy at your raw clip (or upload it via My Assets in ChatCut Web) and ask it to transcribe the dialogue onto a new timeline.
- Lock the A-Roll spine first. Cut filler words, false starts, repeated takes, and dead air to hit your target duration, then layer word-level captions, subtle punch-in zooms, and library sound cues.
- Add B-Roll, Motion Graphics, and ducked music. Ask for opening titles and point callouts (0 ChatCut credits when authored as HTML Motion Graphics), require a live credit quote before any AI B-roll generation, and lay an auto-ducked instrumental track underneath.
- Review on the timeline and export. Open the project in WorkBuddy’s built-in browser or
app.chatcut.ioto check framing and proper nouns, then export 1080p 16:9 and 9:16 MP4s.
What do you need before connecting WorkBuddy to ChatCut?
- WorkBuddy Desktop on a supported OS. Install WorkBuddy on macOS 12 (Monterey) or later or Windows 10 or later and sign in. Check that your selected model and service support tool calling, including when using a built-in model, a custom API, or local Ollama; availability depends on the account and model.
curlandpython3in yourPATH. As documented in the WorkBuddy Web MCP guide, the one-time OAuth registration, PKCE challenge, local callback listener (port 52961), and JSON-RPC check run in Bash on macOS, Linux, or Windows WSL. If you adapt the commands to Windows PowerShell 5.1, invokecurl.exeexplicitly rather than the PowerShellcurlalias (Microsoft curl documentation).- A ChatCut account. ChatCut’s Free plan covers uploads, transcription, timeline editing, captions, agent-authored Motion Graphics, and local exports; a paid plan is required for ChatCut-hosted AI video/image generation and transparent ProRes 4444 export. Browser-local and Desktop-local rendering cost 0 ChatCut credits. Cloud exports include a free allowance; beyond it they follow ChatCut’s current credit rules (see Web vs Desktop Export).
- Source footage and a credit boundary. Start with a clear spoken recording (this master used an H.264 MP4) and state upfront that WorkBuddy must quote exact ChatCut credits before running any paid generation.
How do you connect ChatCut’s hosted Web MCP server in WorkBuddy?
ChatCut’s WorkBuddy installation guide configures the hosted connection with a static Authorization: Bearer header and does not ship a built-in mcp login command (Web Plugin Setup). Instead of copying four OAuth commands by hand, open a WorkBuddy task (with command execution permitted) and send the setup instruction from chatcut.io/web-plugin/workbuddy:
The guide asks WorkBuddy to complete these OAuth 2.0 + PKCE (RFC 7636) steps on your machine and write the MCP configuration:
- Registers a dedicated local OAuth client via Dynamic Client Registration (
POST https://api.chatcut.io/auth/mcp/register) bound tohttp://127.0.0.1:52961/callback. - Generates PKCE
S256parameters (verifierandchallenge) withpython3and opens your default browser to ChatCut’s authorization screen while listening on 127.0.0.1:52961. Sign in in the browser and click Allow ChatCut—never paste your ChatCut password or browser cookies into chat. - Exchanges the authorization code at
https://api.chatcut.io/auth/mcp/tokenfor anaccess_token(valid for roughly 1 hour) and arefresh_token. - Writes
~/.workbuddy/mcp.jsonand runs aninitializecheck. WorkBuddy merges thechatcutHTTP server into~/.workbuddy/mcp.json:
{
  "mcpServers": {
    "chatcut": {
      "type": "http",
      "url": "https://api.chatcut.io/api/external-mcp/mcp",
      "headers": {
        "Authorization": "Bearer <access_token>"
      }
    }
  }
}Once you open a fresh task, you can verify the side-by-side workflow—or jump straight into your own footage—using the startup prompt from the WorkBuddy install guide (for more ready-made briefs, see Edit Videos with WorkBuddy and ChatCut).
Why build A-Roll before B-Roll when prompting an office agent?
This tutorial uses two stages to keep the timing of the spoken story stable before adding visual layers:
- A-Roll (Steps 1 to 4): The spoken recording that carries your argument, tightened to final timing and paired with word-level captions, punch-in framing, and transition cues.
- B-Roll (Steps 5 to 8): Everything stacked above or below that locked spoken spine—animated titles, numbered callouts, AI cutaway shots, ducked music, and aspect-ratio adaptations.
If you ask for animated callouts, B-roll, and music in your very first message and then cut eight seconds of rambling speech afterward, you may need to realign graphics and cutaways with the sentences they illustrate. Locking the 60-second A-Roll first keeps timestamps stable and gives you a natural pause to approve any ChatCut credit estimate before generation runs.
How do you turn one raw talking-head take into 16:9 and 9:16 cuts step by step?
For our shared master edit, we started with mg-teaser.mp4—a 168.2-second (2 min 48 sec, 1920×1080, 30 fps) raw attic recording announcing a software release, complete with seven verbal fillers (uh, um, ah), false starts, repeated explanations, and multi-second pauses between points. Steps 1 through 4 lock the A-Roll; Steps 5 through 8 add supporting layers and export both aspect ratios. All results, durations, and charges below describe that Desktop master run. Chat messages summarize its results in a recreated interface; they are not WorkBuddy logs. The timing table at the end records the master’s operation windows, including waits and checks.
Step 1. Import the raw clip and transcribe speech
Start by importing your source video into a ChatCut project and running cloud speech recognition so the agent can read word-accurate timestamps:
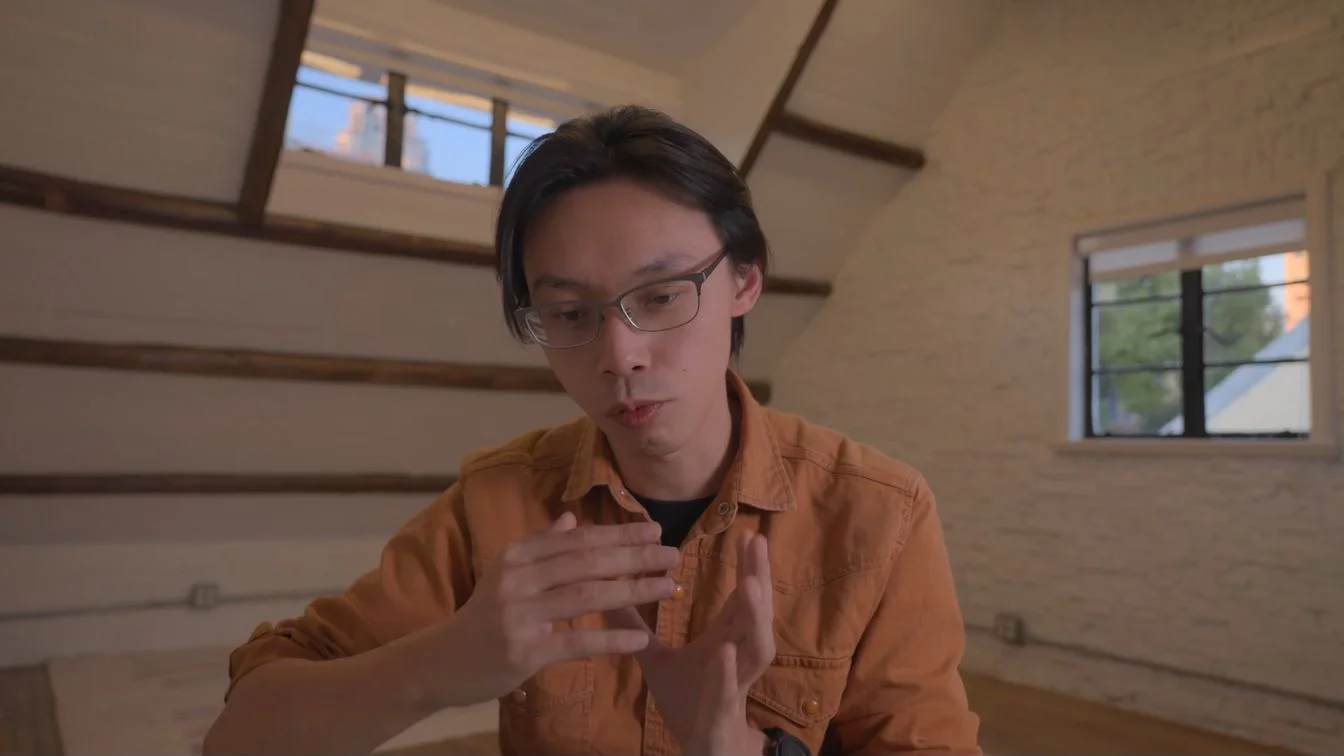
In the master run, ChatCut imported the 168.2-second (5,045-frame) 1080p clip onto a 30 fps timeline and completed word-timed speech transcription, leaving the raw picture untouched before cutting:
You: Import this clip into ChatCut and transcribe it.

WorkBuddy: Imported mg-teaser.mp4 (2m 48.2s, 1920×1080 at 30 fps) into your ChatCut project and finished word-level transcription. Ready for your rough-cut target.
Step 2. Cut 2m 48s down to an exact 60-second 16:9 argument
With the transcript mapped to frames via text-based editing (and ChatCut’s Speech Cleanup workflow), ask for a tight 60-second structure that strips mechanical clutter while keeping the speaker’s core points:
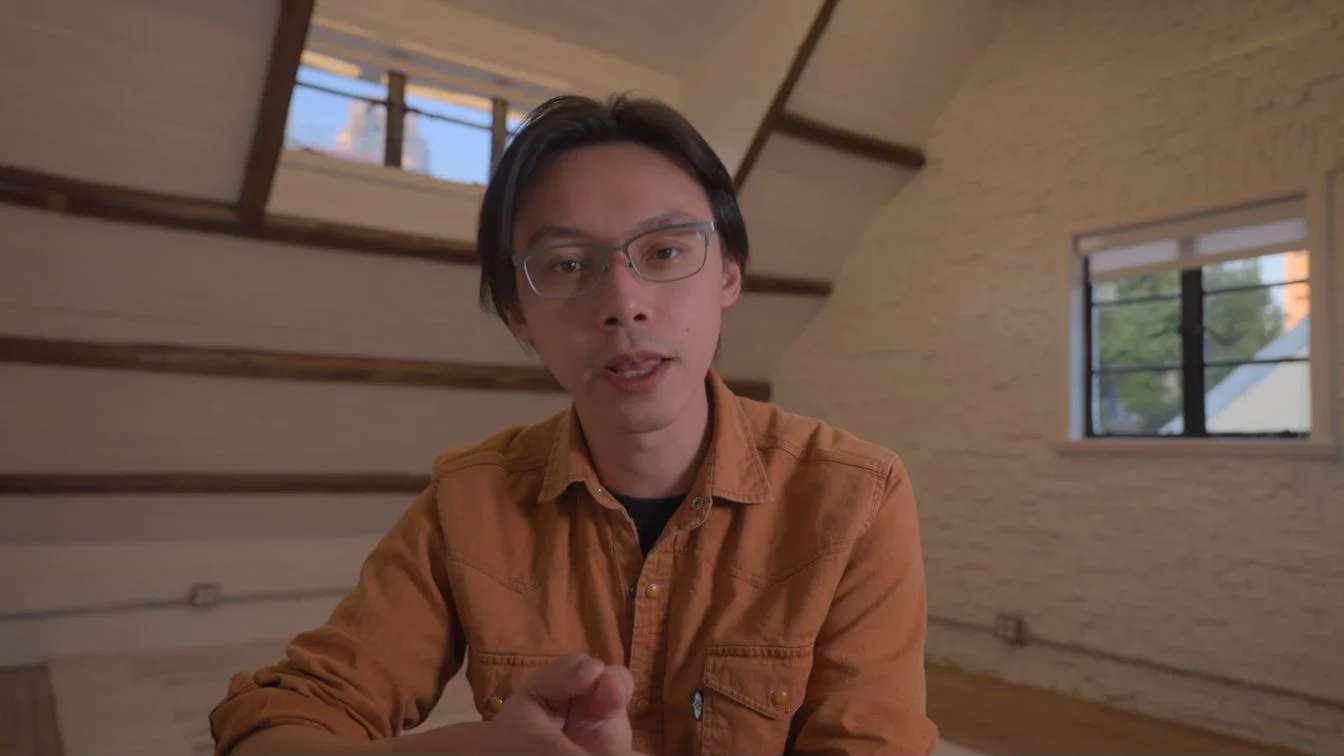
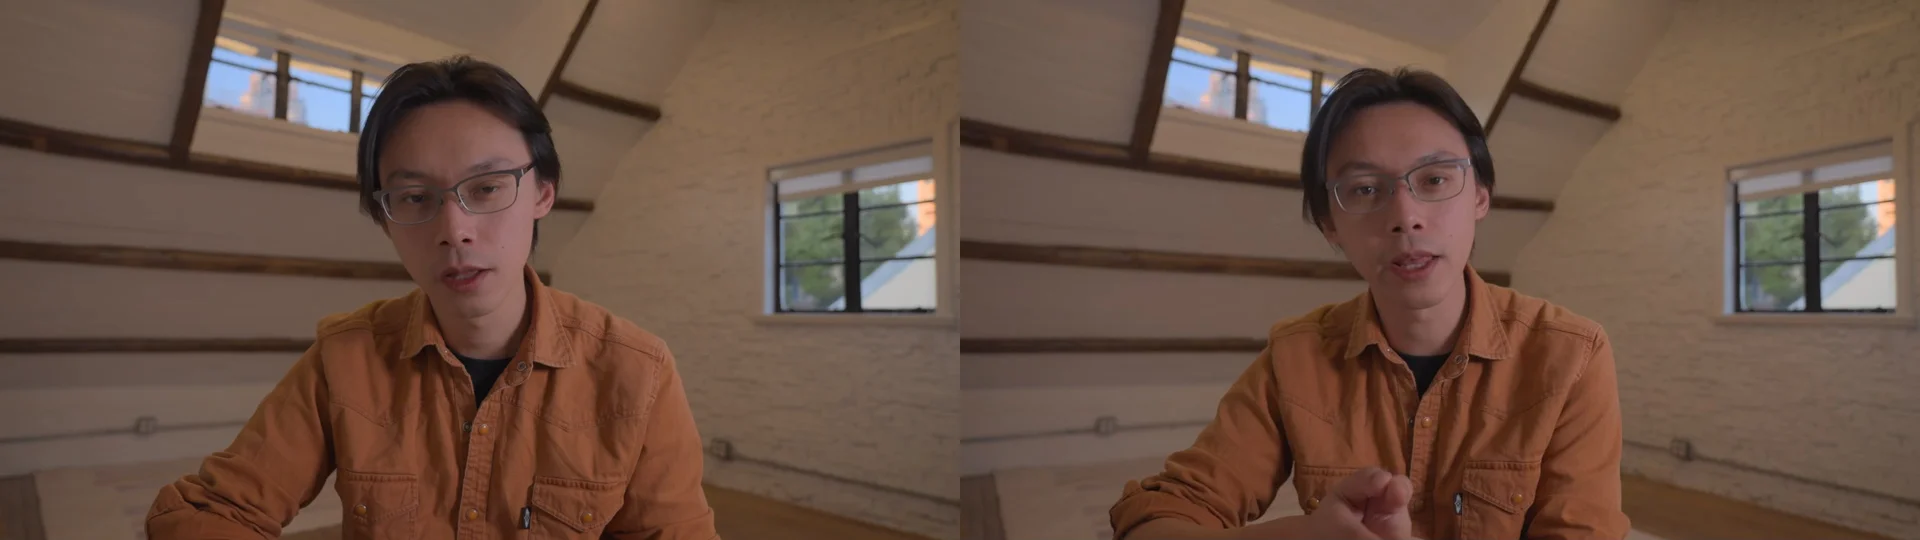
First, mechanical filler cleanup stripped 7 spoken fillers (4× uh, 2× um, 1× ah, removing 2.07 seconds). Next, semantic script selection kept the opening hook, all three release pillars (stability and performance, a redesigned UI, and AI Motion Graphics), and the closing takeaway while dropping retakes and long detours—landing at 66.43 seconds before tightening three remaining pauses (1.60s → 0.35s, 2.16s → 0.40s, and 4.40s → 0.97s) to hit exactly 1,800 frames (60.000 seconds) across 8 segments at 0 ChatCut credits:
You: Make a clean 60-second 16:9 cut: remove filler words, false starts, repeated lines and long pauses. Keep the main argument.
WorkBuddy: Done—your 16:9 timeline is now an exact 60.0s (1,800 frames across 8 segments). I removed 7 filler words, cut repeated takes, and tightened three long pauses while keeping the hook, all three product pillars, and the wrap-up.
Step 3. Add lower-third active-word captions and fix brand spelling
Once the spoken timing is locked, add AI captions styled so viewers on mute can follow along without losing the presenter’s face:
In the master run, the agent authored a custom HTML caption template in bold 64px Arial (font-weight: 800) anchored in the lower third: only the currently spoken word turns warm orange (#FF9B40), while already-spoken words return to pure white. Inspecting the transcript also caught two places where speech recognition heard “Checkout” instead of “ChatCut”; fixing both in the caption layer corrected the on-screen spelling without touching the underlying audio cuts. As W3C WAI advises, automatic captions need accuracy checks:
You: Add word-by-word captions: bold white text, the spoken word highlighted in orange, placed in the lower third.
WorkBuddy: Added bold white lower-third captions where only the active spoken word highlights in orange (#FF9B40), and corrected two misheard 'Checkout' mentions to 'ChatCut' in the display text.
Step 4. Finish the A-Roll with two punch-in zooms and a subtle whoosh
A 60-second single-camera talk benefits from restrained framing shifts on key arguments rather than hyperactive cuts on every sentence:
In the master run, ChatCut placed two 1.18× spring punch-in zooms (0:09.33–0:12.67 on stability and performance, and 0:38.50–0:42.37 on AI Motion Graphics) keeping the presenter’s head and glasses cleanly inside the frame, and pulled Airy Short Whoosh from ChatCut’s built-in sound library at 0:36.43–0:37.20 (-14 dB) to mark the transition into the third pillar. That locks the A-Roll.
You: Add two punch-in zooms on the key lines and a subtle whoosh where the topic changes.
WorkBuddy: Placed 1.18× spring punch-in zooms at 0:09.3–0:12.7 and 0:38.5–0:42.4, plus a subtle Airy Short Whoosh (-14 dB) from the library at 0:36.4 where you pivot to the third topic.
Step 5. Author an animated opening title and a 3-point Motion Graphics callout
Now B-Roll begins. Instead of burning flat PNGs into video, ChatCut lets connected agents code transparent AI Motion Graphics overlays directly onto the timeline:
Matching the presenter’s rust-orange shirt and #FF9B40 caption accent, the agent authored two editable HTML Motion Graphics layers at 0 ChatCut credits in the master run: a centered 0:00–0:03 opening title (“CHATCUT · THE NEW RELEASE” / “Make ideas move.”) with a drawing horizontal accent rule, and a 0:07.5–0:13.5 staggered numbered list (“THREE IMPROVEMENTS”: 01 Stability + performance, 02 A redesigned UI, 03 AI Motion Graphics) positioned over the open attic brick wall on the right with placement checked in the master’s horizontal preview frames:
You: Add a 3-second animated title at the start and a Motion Graphics callout that lists the three points I make.
WorkBuddy: Added two transparent Motion Graphics layers at 0 credits: 'Make ideas move.' from 0:00 to 0:03, and a staggered 'THREE IMPROVEMENTS' list on the right from 0:07.5 to 0:13.5.
Step 6. Quote and generate a 4-second AI B-Roll cutaway
When the presenter describes AI Motion Graphics at 0:42.5, cutting away to an atmospheric studio shot breaks up the single-camera talk. Always require a credit estimate from ChatCut’s AI video generator before submitting a render:
The agent checked pricing first and quoted 4.38 ChatCut credits for one 4-second, 720p, 16:9 Seedance 2.5 shot. The original task authorized that generation within a 5-credit cap. The updated cutaway slowly pushes toward a monitor on a wooden desk in a warmly lit attic: a dark gray screen holds one large orange square above five color blocks (cyan, purple, green, orange, and blue). This is an abstract illustration, not a real software interface or a complete multi-track timeline. The shot used cost 4.38 credits; removing garbled screen text required three generations (the original plus two retries), totaling 13.14 credits. It covers 0:42.5–0:46.5 fullscreen while keeping the presenter’s voice and active-word captions underneath:
You: Generate one short B-roll shot that fits what I'm describing and place it over one line. Tell me the credit cost first.
WorkBuddy: Estimated cost is 4.38 ChatCut credits for one 4-second 720p 16:9 Seedance 2.5 shot. The original generation was within the master task’s pre-authorized 5-credit cap; the updated shot shows a slow push toward a monitor on a wooden attic desk, displaying one orange square and five color blocks on dark gray, with no screen text or logos. This is an abstract illustration, not a real software interface.
WorkBuddy: Generated and placed from 0:42.5 to 0:46.5 over your AI Motion Graphics explanation, keeping your spoken audio and lower-third captions intact. The shot used cost 4.38 credits; the original plus two retries to remove garbled screen text cost 13.14 credits in total.
Step 7. Add a calm ambient music bed with automatic voice ducking
To glue the eight spoken segments together without spending generation credits, ask for a calm background bed that ducks automatically under speech (or generate custom tracks when needed with ChatCut AI music):
In the master run, at 0 ChatCut credits, the agent used a CC BY 4.0 instrumental track (Relaxing Ambient Melodies by ViraMiller on Freesound), trimmed it across 0:00–1:00 with a 1.5-second fade-in and 2.0-second fade-out, and linked the spoken track as the ducking anchor and the music track as the follower (leaving the -14 dB whoosh independent). Native multi-track audio rendering verified an integrated mix of -20.3 LUFS (-2.0 dBFS peak), with voice RMS at -24.7 dBFS and music at -27.3 dBFS. These measurements do not establish perceived clarity; a full subjective listening pass was not completed. The track’s first 60 seconds were used with trimming, fades, and ducking; retain the linked author and license credits when publishing:
You: Add a calm music bed and duck it under my voice.
WorkBuddy: Added 'Relaxing Ambient Melodies' (ViraMiller, CC BY 4.0) from 0:00 to 1:00 with a 1.5s fade-in, 2.0s fade-out, and voice-anchored auto-ducking (full mix renders at -20.3 LUFS, 0 credits).
Step 8. Export the 1080p 16:9 MP4 and adapt a 9:16 vertical Short
Finally, deliver the finished 1920×1080 horizontal cut and spin out a 1080×1920 vertical timeline from the exact same edit (Exporting guide):
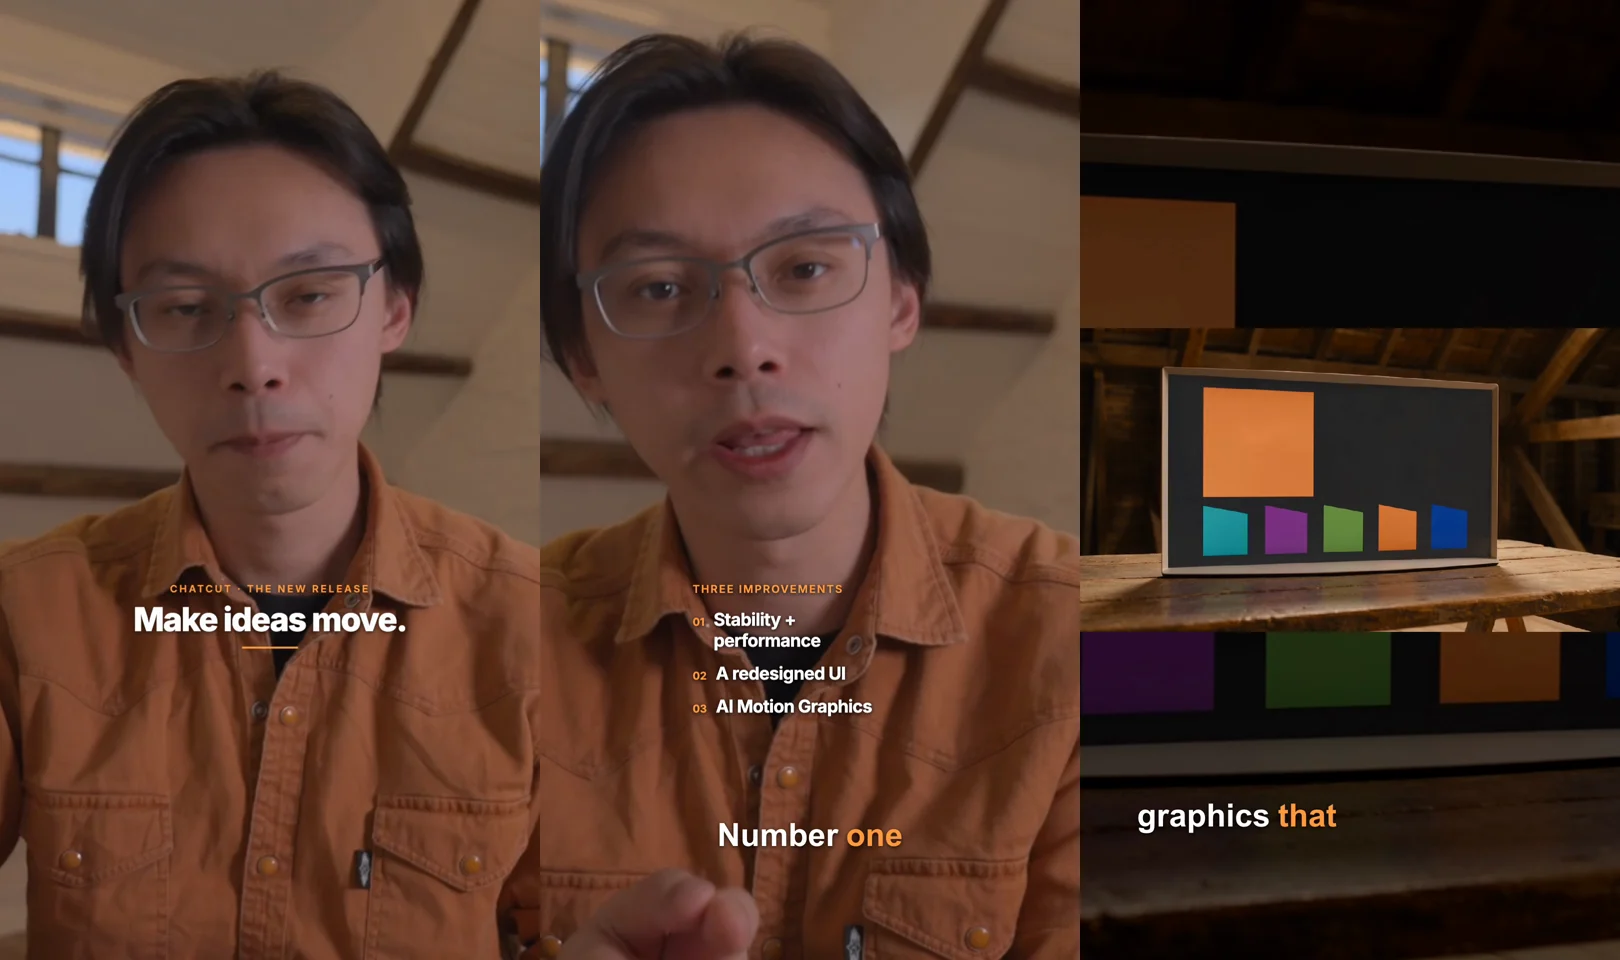
Simply center-cropping a 16:9 project to 9:16 clips wide Motion Graphics cards and chops off the sides of a wide monitor shot. After exporting final-16x9.mp4 (1920×1080, 30 fps, 60.0s), the agent duplicated the edit onto a dedicated Shorts · 9x16 timeline, centered the presenter, resized and reflowed both the “Make ideas move.” title and the “THREE IMPROVEMENTS” callout inside vertical safe margins, and letterboxed the 16:9 attic-monitor cutaway with abstract color blocks at full width over a darkened (-3 EV), scaled-up background copy so neither side of the monitor was lost (0 ChatCut credits for the master’s two local exports):
You: Now make a 9:16 vertical version for Shorts from the same edit, keeping the speaker centered, and export it too.
WorkBuddy: Duplicated the cut to a 9:16 Shorts timeline, centered you in frame, resized the opening title and 3-point list for vertical screens, framed the 16:9 attic-monitor B-roll with abstract color blocks over a darkened -3 EV backdrop so nothing is cropped, and exported the 1080×1920 MP4.
| Step | Master timeline action | Recorded M0 step window (excludes retries) | ChatCut credits (including retries) |
|---|---|---|---|
| 01. Import & transcribe | Imported 168.2s (5,045f) 1080p clip + word-timed cloud transcription | 0:38 | 0.00 |
| 02. 60s rough cut | Removed 7 fillers + retakes, tightened 3 pauses to 1,800f (60.0s, 8 cuts) | 1:33 | 0.00 |
| 03. Active-word captions | Bold white Arial 64px HTML template, #FF9B40 active word, 2 ChatCut fixes | 1:06 | 0.00 |
| 04. Zooms & whoosh | Two 1.18× spring punch-ins + library Airy Short Whoosh at -14 dB | 0:25 | 0.00 |
| 05. Motion Graphics | 0–3s Make ideas move. title + 7.5–13.5s THREE IMPROVEMENTS list | 1:51 | 0.00 |
| 06. AI B-Roll cutaway | 4s 720p Seedance 2.5 attic-monitor cutaway with abstract color blocks (42.5–46.5s); original + two retries to remove garbled screen text | 5:29 | 4.38 for the shot used; 13.14 across three generations |
| 07. Music & ducking | 60s CC BY 4.0 ambient track, 1.5s/2.0s fades, voice-anchored ducking (-20.3 LUFS) | 0:50 | 0.00 |
| 08. 16:9 + 9:16 exports | Exported 1920×1080 MP4 + reflowed & exported 1080×1920 Shorts MP4 | 1:50 | 0.00 |
| Overall window | Original M0 timing includes waits, checks, and brief gaps between steps; excludes later retries | 13:46 | 13.14 including retries; all other steps 0.00 |
If you want to finish color grading or mixing in Premiere Pro or DaVinci Resolve, open Export in ChatCut and download an FCP7 XMEML timeline (0 credits; rendering Motion Graphics as transparent ProRes 4444 alongside XML requires Pro).
Which WorkBuddy skills and remote workflows pair best with video editing?
Once chatcut is registered in ~/.workbuddy/mcp.json, you can combine ChatCut’s timeline engine with three features documented in Tencent’s WorkBuddy guides that can support an editing workflow:
- Pull saved ChatCut playbooks alongside local WorkBuddy skills. Saved and catalog ChatCut Workflow Skills travel directly over the hosted MCP connection—just ask WorkBuddy to list your available ChatCut skills and follow the matching workflow guide, with nothing extra to download (WorkBuddy MCP guide). Around the edit, pair ChatCut with native WorkBuddy skills: read local release notes or Markdown docs in your selected workspace to draft the rough-cut brief, or save your team’s caption color (#FF9B40), loudness target, and credit cap as a reusable local
SKILL.mdso every weekly update follows the same house style. - Use messaging apps to request work remotely. WorkBuddy’s Assistant Remote Control binds your desktop client to WeChat (via QR scan, no developer tokens needed) or Slack, Telegram, and Discord bots, routing messages from different apps into one continuous thread. Enable Allow Running When Locked under System Settings → Operation → Lock Screen Remote so the device stays awake while locked. Available platforms depend on your account, edition, and administrator policy. As a proposed workflow, ask for a rough cut from your phone after verifying the ChatCut connection and media access; this remote video workflow was not tested in the master run.
- Schedule recurring prep with WorkBuddy Automation. On the Automation page, you can bind a workspace folder, model, skills, and connectors to a recurring weekly schedule—a possible weekly task is to read incoming recordings and prepare a rough-cut brief. Keep the computer and WorkBuddy running and ensure connector authorization is still valid when the job runs. This is a suggested use, not a tested unattended ChatCut workflow.
For a broader look at how hosted and local MCP connections compare across agents, read our breakdown of the best video editing MCP servers and AI video agents.
Which prompts can you copy for everyday WorkBuddy video tasks?
Adapt either brief below inside a fresh WorkBuddy task (more stage-by-stage templates live in our video editing prompts collection):
Stakeholder or product-update talking head (0 ChatCut credits)
Long webinar or interview to 9:16 vertical Shorts
Pair this prompt with our guide to turning long videos into Shorts or the Long Video to Shorts workflow:
What do you still need to check yourself before publishing?
Inspecting our exported 60.0-second horizontal and vertical MP4s surfaced five details that an agent’s text summary will never replace:
- Brand names and technical terms in captions. Speech-to-text heard “ChatCut” as “Checkout” twice in our raw attic take. Always skim the Captions panel against your audio—and edit spelling inside Captions, not by deleting words in the Transcript panel (deleting transcript words cuts timeline frames).
- Frame-by-frame review of AI-generated B-roll. The updated attic-monitor cutaway (
06-broll.webp) uses an orange square and five color blocks on a dark gray screen as an abstract illustration, not a real software interface or a complete multi-track timeline. It passed frame-by-frame inspection after two retries removed garbled screen text. AI-generated screens and signs commonly produce garbled text: specifyno text, no letters, no logos, no UI labels, inspect every frame before use, and budget credits for retries. The shot used cost 4.38 credits; all three generations cost 13.14 credits. Record real screen captures whenever viewers need to read product text. - 9:16 overlay margins and wide cutaways. Auto-cropping 16:9 graphics into 9:16 clips wide headlines and chops off screen edges. Scrub your vertical timeline in
app.chatcut.ioto verify that titles, bullet lists, and horizontal cutaways were reflowed rather than blindly zoomed. - A real headphone pass from 0:00 to the end. The master’s loudness measurements (-20.3 LUFS integrated, -2.0 dBFS peak) and ducking configuration do not prove speech intelligibility or listening quality. A full subjective listening pass remains to be done. Listen through once with headphones to make sure tightened pauses (0.35s–0.40s) did not clip an inhale or rush a punchline.
- Music attribution and synthetic-media disclosure. Keep required license credits (such as CC BY 4.0 attribution when publishing Freesound tracks) and enable platform disclosures like YouTube’s AI-use disclosure setting whenever realistic AI B-roll appears in your cut.
How do you fix common WorkBuddy and ChatCut MCP issues?
The chatcut server never shows up in WorkBuddy’s MCP settings
Check two things first. First, verify the exact path is ~/.workbuddy/mcp.json without a leading dot—WorkBuddy ignores ~/.workbuddy/.mcp.json. Second, restart WorkBuddy or click New task; MCP tool lists are fixed when a conversation starts, so the session that wrote mcp.json cannot use the new tools until you open a fresh thread.
ChatCut requests fail with Unauthorized after about an hour
Because WorkBuddy uses a static Authorization: Bearer header, the short-lived access_token expires after roughly 1 hour (WorkBuddy install guide). Exchange your saved refresh_token for a fresh access_token without redoing browser login:
curl -s -X POST "https://api.chatcut.io/auth/mcp/token" \
  -H "Content-Type: application/x-www-form-urlencoded" \
  -d "grant_type=refresh_token" \
  -d "refresh_token=<REFRESH_TOKEN>" \
  -d "client_id=<CLIENT_ID>"
Paste the new access_token into ~/.workbuddy/mcp.json (or WorkBuddy’s MCP settings UI) and start a new task; if the refresh_token itself has expired, rerun the PKCE browser step from /web-plugin/workbuddy.
Installing ChatCut Desktop turned off the hosted Web plugin
This is expected behavior (Web Plugin docs). When ChatCut Desktop (supported on macOS 13+ and Windows 10+ x64; Linux is not supported per Product Facts) is installed and opened on the same computer, it registers its local MCP connection with WorkBuddy and disables the hosted Web plugin so WorkBuddy edits local Desktop projects instead of cloud Web projects. Check Agents on this computer in ChatCut Desktop (click Confirm in WorkBuddy if prompted) and verify which connection is active before editing.
Setup commands fail on Windows PowerShell
The OAuth registration and token-exchange snippets in /web-plugin/workbuddy use Bash quoting (curl + python3). Use a Windows Bash environment such as WSL; if you adapt them to Windows PowerShell 5.1, call curl.exe explicitly so PowerShell does not alias curl to Invoke-WebRequest.
Browser export is blocked or a paid generation goes quiet
Through the hosted Web MCP connection, video and audio exports default to browser rendering in a signed-in supported browser kept open on the project (Web vs Desktop Export). If browser rendering is unavailable, an agent will not silently switch to cloud export—you must explicitly request or approve cloud rendering (up to 1080p, once all timeline media is remotely readable). Cloud exports include a free allowance; beyond it they follow ChatCut’s current credit rules (see Web vs Desktop Export). ChatCut asks for confirmation before any paid cloud export. Likewise, while a video render is still pending, ask WorkBuddy to check the existing job ID rather than resending the generation prompt to avoid accidentally submitting a second paid job.
How did we test and verify this guide?
ChatCut publishes this first-party guide. All WorkBuddy product facts—macOS 12+ and Windows 10+ system requirements, Daily Office vs. Code Development modes, uploaded WorkBuddy skills security scanning, model configuration, Assistant Remote Control, Automation, and Free/Pro/Team credit tiers—were verified against Tencent’s official documentation on workbuddy.ai on November 18, 2026. All OAuth 2.0 + PKCE port 52961 registration steps, ~/.workbuddy/mcp.json configuration rules, and 1-hour token refresh commands follow ChatCut’s WorkBuddy installation guide; this fact-check did not execute installation or sign in to WorkBuddy.
The eight-step attic release edit (168.2s raw input → 60.0s 1920×1080 and 1080×1920 H.264 MP4s in the original M0 operation window of 13 minutes 46 seconds, excluding later retries) was executed on November 18, 2026 by Codex in ChatCut Desktop. The updated cutaway cost 4.38 ChatCut credits for the shot used and 13.14 across three generations (the original plus two retries to remove garbled screen text); all other steps cost 0 credits. Its report records ffprobe parameter checks, full ffmpeg decode checks, and sampled frame inspection; <AgentChat agent="workbuddy" /> blocks recreate the WorkBuddy task chrome around the verbatim prompts, real timeline stills, and exported videos.
Questions about editing video with WorkBuddy and ChatCut
Can WorkBuddy edit my own recorded videos instead of just generating AI clips?
Do I install a ChatCut skill zip or configure ~/.workbuddy/mcp.json?
Why did my ChatCut MCP connection in WorkBuddy start returning Unauthorized?
How much does editing a video with WorkBuddy and ChatCut cost?
Can I trigger a video rough cut in WorkBuddy from WeChat, Slack, or Telegram?
What happens if I also install ChatCut Desktop on the same Mac or Windows PC?
Can I hand off a WorkBuddy-edited ChatCut timeline to Premiere Pro or DaVinci Resolve?
Using a different agent? The same ChatCut edit works from ChatGPT, Codex, Claude Code, Cursor, Antigravity, Grok Bot, OpenClaw, Hermes Agent and Meta Muse; each guide covers that agent’s install and quirks.